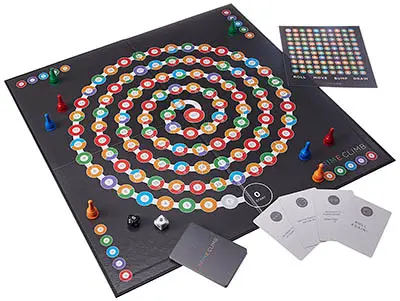
Components
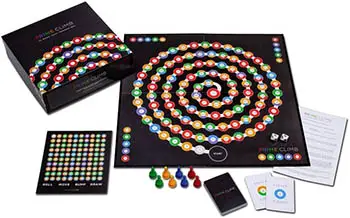
- Prime Climb board
- Multiplication Table
- 24 Prime Cards
- Eight pawns
- Two 10-sided dice
- 4 blank Prime Cards
- Rulebook
Setup
Lay out the board, shuffle the 24 Prime Cards, place two pawns on Start for each player, and roll the dice to decide who will play first. You're ready to go!
Object of the Game
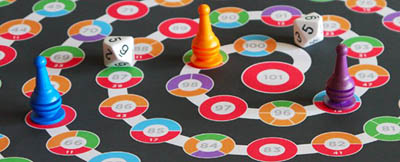
See the 101 circle? It's the big red circle at the center of the spiral. The goal of Prime Climb is to land both your pawns on 101 exactly.
Game Play
Players take turns until someone wins by landing both pawns exactly on the 101 circle. You are never allowed to move a pawn past 101. All players begin the game with both pawns at the Start circle, which counts as 0.
A turn consists of four phases: Roll, Move, Bump, and Draw.
1. Roll
Roll the dice. The two numbers you roll will be used, one at a time, to move your pawns. In other words, if you roll a 3 and a 5, you have a 3 and a 5 to use on your turn; you do not get to use an 8, a 15, or a 35.
In the case of doubles, you may use the number you rolled four times instead of twice. The "0" on the dice stands for "10". You must use all your rolls.
2. Move
During your Move Phase, you add, subtract, multiply, or divide the number your pawn is on by a number you rolled and send that pawn to the resulting number.
You must use both of your rolled numbers, one at a time. If you have Keeper cards, you may choose to play one or more of them before, between, or after applying your dice rolls. Your pawns may land on any space on the board, including occupied spaces.
Pawns may never move to a space not on the board, such as negative numbers, non-whole numbers, or numbers greater than 101.
Example: Say you have a pawn on 14, and you roll a 3 and a 9. You could, if you chose, subtract 3 from 14 to land on 11, then multiply 11 by 9 to move to 99. Note that each die is applied one at a time. You cannot multiply 3 times 9 and use 27 for your move.
3. Bump
If you end your Move Phase with either of your pawns on the same space as another pawn, send the pawn you landed on back to Start. Bumping is not optional.
Note: You can bump your own pawns.
Note: You bump a pawn only when you end your turn on an occupied space, not when you pass through an occupied space.
Example: You have a pawn on 31. Your opponents have pawns on 33 and 37. You roll a 2 and a 4, which you apply by adding the 2 to move from 31 to 33, and then adding the 4 to move from 33 to 37.
You bump the pawn on 37 back to Start. You do not bump the pawn on 33 back to Start, since you did not end your Move Phase on 33.
4. Draw
You draw a Prime Card after your Move and Bump Phases are completed if:
At least one of your pawns is on an entirely red space (i.e., a prime number greater than 10), and
That pawn did not begin its turn on that space.
You may draw only one card per turn, even if both your pawns end on red spaces. No card trading is allowed! There are two types of cards: Keeper Cards and Action Cards.
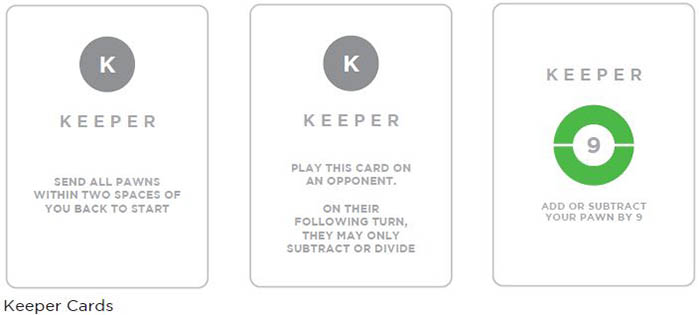
Keeper Cards
If you draw a Keeper Card, keep that card, face up, for a future turn. You may play any number of Keeper cards during your Move phase. You may not play a Keeper Card the turn you draw it.
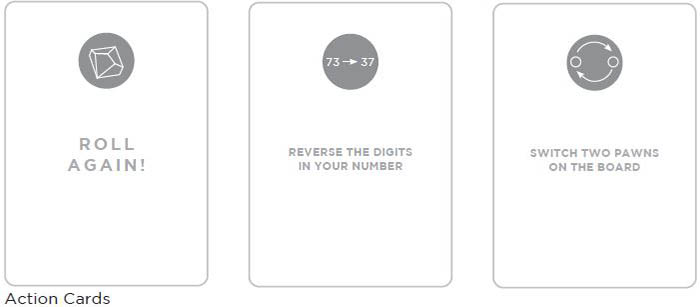
Action Cards
Any card that does not say Keeper on it is an Action Card. When you draw an Action Card, immediately perform the action the card requires.
If the Action Card requires you to move one of own pawns, you must move the pawn that landed on the red space; if both your pawns moved to red spaces that turn, you may choose the pawn the card applies to.
If an Action Card takes your pawn to an occupied space on the board, bump the pawn you land on back to Start. If an Action Card takes your pawn to a new red space, do not draw another Prime Card. In some positions, Action Cards may have no effect.
After you play a card, discard it. If you run out of cards, shuffle the discard pile and continue drawing as necessary.
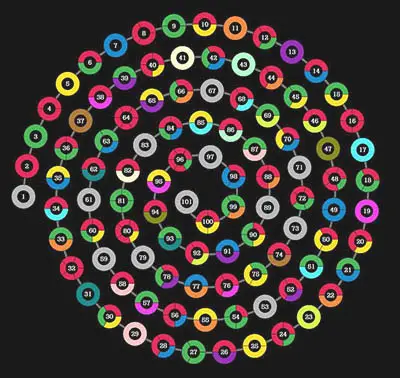
Using The Colors
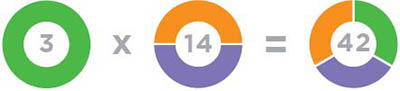
The Prime Climb board is color-coded to make multiplication and division easy. Every time you multiply, the colors of the two numbers multiplied together are combined.
For example, say you have a pawn at 14 and one of your rolls is a 3. You decide to multiply 14 by 3, but aren't sure what that product is. The colors will tell you.
Notice that 14 is orange and purple, while 3 is green. That means that 14 times 3 will be orange, purple, and green. The only circle with exactly those colors is 42, which is 14 times 3.
This works for division too. Say you want to divide 84 by 4. When you divide, all you do is remove the colors of the smaller number from the bigger one. In this case, you need to remove the two oranges in 4 from the colors in 84.
That means you're looking for a number with the colors purple and green. Sure enough, 21 has precisely those colors, and 84 divided by 4 is 21.
For players who haven't mastered all their arithmetic, you can use the the colors to check your math, or even do the work for you! In other words, you can start playing now with whatever you know, and the colors will help you. As you learn more math, you'll see that more is possible in Prime Climb!
End of the Game
When your first pawn reaches the 101 circle exactly, remove it from the board. You cannot move to a number past 101, or "bounce off" 101.
Example: You want to apply a roll of 7 to pawn on 98. You cannot roll to 101 by adding, and cannot roll forward 3 and back 4 to end at 97. The only options available are to subtract to end at 91, or divide to end at 14.
After your first pawn reaches 101, you must apply all dice rolls to your remaining pawn. You win immediately when you can apply a dice roll or Keeper card to land your second pawn on 101. You do not have to use both dice rolls on your winning move.
Do not draw a Prime Card when you land on 101.
Examples
Example 1: With pawns on 4 and 26, you roll a 3 and a 9. You could:
- Add 3 to move your pawn from 4 to 7, then multiply by 9 to move your pawn from 7 to 63.
- Multiply by 3 to move your pawn from 26 to 78, then add 9 to move it from 78 to 87.
- Add 9 to move one pawn from 4 to 13, and multiply by 3 to move the other from 26 to 78. Since 13 is completely red, you would draw a Prime Card.
- You CANNOT add the 3 and 9 to use a 12. You CANNOT multiply 3 and 9 to use a 27. You have to apply the numbers on the dice one by one.
- You CANNOT add 9 to 26 to make 35, and then multiply 35 by 3, for if you did, you would go to 105, which is off the board. You must stay on the board at all times. (It's not enough just to end up on the board at the end of your turn).
Example 2: You roll double 2s, with a pawn on 78, and an opponent pawn on 42. This means you have four 2s that you must use. You could:
- Add 2 (80), divide by 2 (40), add 2 (42), and add 2 (44). Note that even though you passed through a spot where an opponent had a pawn, you do not bump it back to start, because you did not end your Move Phase on 42.
- Add 2 (80), add 2 (82), add 2 (84) and divide by 2 (42) to end your turn at 42 and send your opponent back to start.
- Divide by 2 (39), add 2 (41), add 2 (43), and subtract 2 (41) to end at 41, and draw a Prime Card.
Example 3: People sometimes ask why you would ever subtract or divide. As you play more, you'll see opportunities where subtraction and division open up great moves. Here is a case where you might want to divide. With a pawn on 64, you roll a 2 and a 3. You could:
- Divide by 2 (32) then subtract 3 to end at 29. Since 29 is completely red, draw a Prime Card.
- Divide by 2 (32) and multiply be 3 to end at 96! Division gets you closer to 101 than any of your other options.
Continue Reading

