Designed by: JonnyPac and David Turczi
Coloma - Challenging Shade

In the rules below "you" refer to the lone human player, and "it" or "Shade" refers to the automated opponent. "Buster" refers to the 3rd, neutral piece, which works exactly as described in the 2-player rules.
Additional components required for solo only:
- 4 wagon movement cards
- 1 coin (heads/tails)
Setup
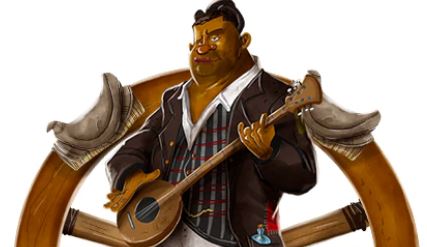
Setup the board the same way as for 2-players: 1 pioneer piece for yourself, 1 piece for Buster, and 1 piece for your dreaded opponent, the fastest gun in the west: Shade. Who is Shade? Nobody knows! A mysterious enemy ready to bust you for any mistake!
Use parts from a non-player color (a different color than the 3 dummy gunmen at the Shootout) to represent Shade.
Make a supply area for Shade and give its supply:
- 12 Dudes
- 5 Camps (and 1 more Camp on Event 5)
- The Sheriff Badge (it is the start player)
- 1 Horse (Shade can have up to 4 Horses)
- It will only collect gold, Barrels, Horses, Hotels, and Rivers.
- Place a wagon for Shade on Coloma on the Frontier Map.
- Shuffle and place face-down the deck of four Wagon-movement cards/tokens, one each for Hangtown, Georgetown, Folsom, and Auburn.
- Return any other player parts to the box (it does not need a deck, player board, etc).

Game Play
-
Before your turn, shuffle all 5 Buster cards and reveal 2 cards from Buster's deck as in the 2 player game, laying out the 2 revealed cards on the table side by side (where Buster will not go).
-
Place your own pioneer.
-
Toss a coin to select one of the 2 revealed cards: heads for left, tails for right. Place Shade's pioneer on the location corresponding to that card. (Note: This means Shade will never go to a place Buster is).
-
Depending where Shade's pioneer ended up, you will carry out actions for it (minding player order if you are at the same Site).
If Shade Busts, ignore the BOOM part of its turn.
Note: If Shade gets the BOOM from the Signpost, reference the adjacent Site's BOOM rules accordingly.
-
Resolve your own action as normal.
Explanation of Shade's Actions
Site 1
Common: It gains 1 gold, then scores 1 point for each gold missing from the board's supply. Count all the vacant spaces in the 2-player gold area, and it scores 1VP for each one.
Note: Shade keeps its gold until the end of the game. It only spends it at Event 5 otherwise. See below.
Boom: It scores 2 points per Barrel in its supply.
Site 2
Common: It takes a River/Bridge (and score VP for them).
If Shade can take a Bridge it will-but it needs a River tile in its supply for each Bridge. Follow these guidelines:
- If it does not have a River, it takes 1 River tile and scores 8VP.
- If it has a River tile, it takes the top Bridge from the board. Discard it and the River tile from its supply. Then it scores 12VP.
Notes: When there are two bridges in the supply in the same row, Shade will take the leftmost one. It has no limit on Rivers or Bridges-meaning unlike you, it can take more than four of each per game.
Boom: It repeats the COMMON action above, minding the same rules.
Note: If Shade Booms it may combo a River + Bridge, etc.
Site 3
Common: it builds 1 Hotel and scores 6VP. Take one Hotel from the board and place it face-up in Shade's supply.
Note: If there are no more Hotels it just scores 6VP.
Boom: It scores 6VP (as if Shade built a Town Building card).
Site 4
Common: Move Shade's Wagon.
Wagon Movement: Use the deck of four cards/tokens, one each for Hangtown, Georgetown, Folsom, and Auburn.
Draw 1 randomly and move its Wagon there. Then shuffle the cards/tokens.
Note: If the card/token shows the same place Shade's wagon is already at, leave the wagon there.
Boom: Shade scores 3VP per Horse in its supply.
Site 5
Common: Shade places a Camp in each Frontier Land that is adjacent to its wagon.
Note: If Shade's wagon is still in Coloma-or if it already has Camps placed in the Frontier Land(s), ignore this action.
Boom: Fill a row on at the Shootout with Shade's gunmen (taken from its supply).
Shade will always choose first vacant row with the fewest spaces to fill.
For example, if the row with one gunman space is vacant, it will fill it (by taking one Dude from its supply).
Note: If Shade does not have enough Dudes to fill a row, ignore this action.
Barker 
Common: It gains 1 Horse
Note: If Shade has already reached its maximum of 4 Horses, ignore this action.
Boom: It takes the leftmost available Barrel from the board (and place the number of outlaws shown at the Shootout).
Note: Shade keeps the Barrel face-down in its supply.
Events
Shade ignores all events except for Event 5:
- If it has 2 or more gold, it spends 2 gold to gain 6VP.
- If it has 1 gold, it spends 1 gold to gain 3VP.
Note: If he has none, he ignores this Event.
Shootouts
Shade and the row of 3 dummy gunmen each "score" their tiers separately. Unlike the dummy row, Shade scores its VP.
Note: If Shade needs to take a penalty, ignore it. Discard all of Shade's used gunmen from the game after the Shootout, regardless of the result of the shootout.
Final Scoring
Count how many Dudes Shade has left in its supply (as some have been used in Shootouts). Score its Hotels just like you would your own, 1VP per Dude (max 6VP per Hotel card).
Score the Frontier Map for Shade's Camps the usual way: 3/6/10/15/21 VP
Gold Rush - An Additional Challenge
To increase difficulty:
Setup: Place a Camp for Shade at Event 2.
Play: Shade gains 2 gold every Event 2.
Continue Reading
