Components
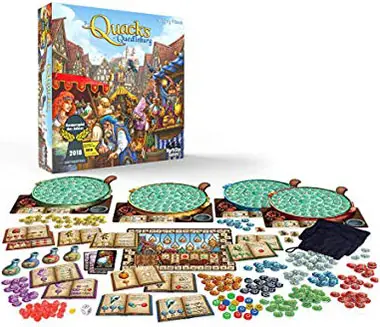
- 4 Pots (player boards)
- 4 Flasks
- 4 Bags
- 8 Droplets
- 4 Rat stones
- 1 Scoring Track
- 4 Scoring Markers
- 1 Flame (round marker)
- 24 Fortuneteller Cards
- 20 Rubies
- 12 Ingredient Books
- 215 Ingredient Chips
- 4x 0/50 Seals
- Bonus Dice
Setup

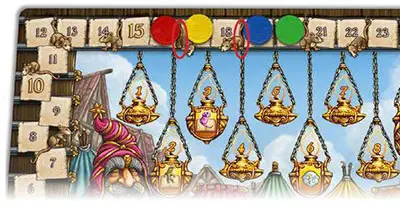
The last person to cook something goes first. The start player then shuffles the Fortune Teller cards and puts them face down into a draw pile in front of them. Now put the Scoring Track in the middle of the table.
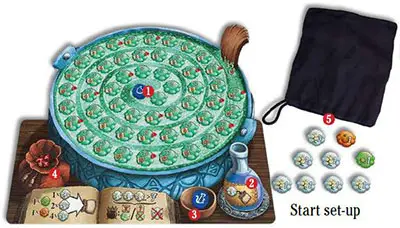
The Flame 1 goes on the 1-space of the Turn Indicator. The 4 seal tiles go on the 4 seal spaces 2 with the "0" facing up.
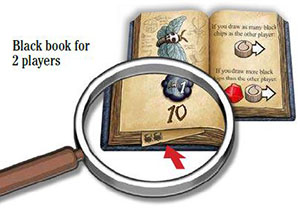
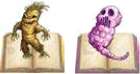
Lay out the orange and the black books. You will need these books in every game. In the black book, there is a page for a 2-player game, as well as one for a 3- and 4-player game. The number of pots depicted at the bottom indicates the number of players.
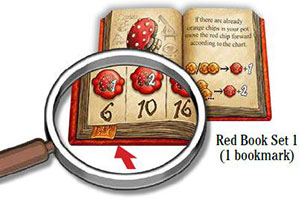
The other ingredient books are compiled into 4 sets, each one with 5 different ingredients (green, blue, red, yellow and purple). The sets are indicated by the same number of bookmarks depicted on the lower edge of the book.
Be careful to look at both the front and back sides of the books. For the first game, use Set 1 (books with only 1 bookmark). Once you are familiar with the set, we recommend trying Set 2, then Set 3, and finally Set 4.
Now lay out only the green, blue and red books from any one set. Put the yellow and purple books off to the side. They will come out in Turns 2 and 3 respectively. Separate the ingredient chips according to their colors and put them next to their corresponding ingredient books.
To start off, lay out only the green, blue and red books from any one set. Put the yellow and purple books off to the side for now.
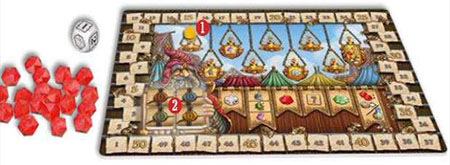
Each player receives one pot (player board), one bag, and the scoring marker in the color of their choice, which they place on the seal tile of the same color. Each player places their pot in front of them with the side without the test tubes facing up, and places their droplet on the "0" space in the middle of the pot. 1
They will also need a flask 2 in their color, which is placed on the large trivet next to the pot (bottom right) with the full side facing up. The rat stone 3 is placed on the small trivet the left of the flask.
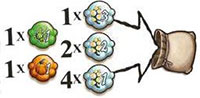
Now each player takes 4 white 1-chips, 2 white 2-chips, 1 white 3-chip, 1 orange 1-chip and 1 green 1-chip. and puts them into their bag. A visual depiction of which chips initially' go into the bag is depicted on the bottom left of the pots (front side of the pots only) 4.
Game Play
The game consists of 9 turns. The Flame piece (turn marker) indicates what turn it is.
Fortune Teller Cards
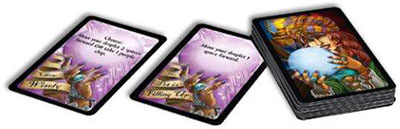
At the beginning of each turn, the player who has the Fortune Teller cards in front of them reads the first card aloud, then lays it face up next to the Scoring Track, which starts the discard pile.
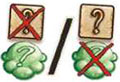
The action that was read out applies for all players. If the action states that the players can take a yellow or purple chip, they can only do so if the corresponding ingredient book is already uncovered.
If it is a purple Fortune Teller card, it is carried out directly before the turn starts. If it is a blue card, it applies for the whole turn or at the end of the turn.
The Rats

(starting on the 2nd round). Once the Fortune Teller card has been read out, the rats come into play. The rats make your pot a little fuller before the potion is prepared. Everyone, except for the player in the lead, can throw rat-tails into their pots, which enables them to move their rat stones forward in their pots.
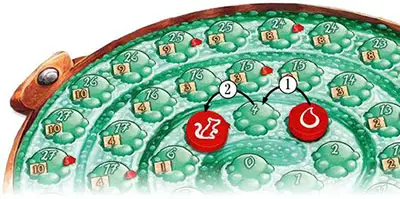
To determine how many spaces the rat stones can move forward, each player counts the number of rat-tails between them and the leading player on the Scoring Track. Each player's rat stone is then placed that number of spaces past their droplet.
Example: The green player is in the lead. The blue player is in second place. There is no rat-tail between blue and green. Therefore, the blue player cannot use their rat stone in this round.
There is 1 rat-tail between green and yellow, so the yellow player can set their rat stone 1 space ahead of their droplet. There are 2 rat-tails between green and red. Player red, therefore, can move their rat stone 2 spaces ahead of the droplet.
Once the rat-tails have been counted up and the rat stones moved accordingly, the players simultaneously prepare their potion.
Potions Phase
To prepare their potions, everyone draws chip after chip from their bags, placing them on the appropriate numbered space in their pots. There are no individual turns during the Potions Phase. Everyone prepares their potions at the same time. Even though they players are filling their pots at the same time, they do not have to draw their chips simultaneously.
According to its value, place the first chip you draw on the space directly after the droplet (or rat, if you have one in your pot). The chips have the values 1, 2, 3 and 4.
A 1-chip goes on the 1st space after the droplet or rat, a 2-chip goes on the 2nd space, and so on. For each subsequently drawn chip, place it after the previously laid chip according to its value. Any empty spaces in between remain empty.
Example: The first chip that Lucas draws from his bag is an orange 1-chip, which he places on the first space after the droplet (space-1). Then he draws a yellow 2-chip from his bag. He places this chip 2 spaces after the orange chip onto space-3. If he draws a 1-chip next, he would place it on space-4.
After each chip is drawn and placed, players decide whether they want to stop or draw another chip from their bag. They might want to stop in fear of having their pot blow up. If a player has no more chips in their bag they must stop. Players that have stopped lay their bags in front of them on the table so that it is clear who is still actively drawing chips from their bags. You are never allowed to look into your bag.
Stopped by an Explosion
If the sum of all white chips drawn exceeds the value of 7, you have too many cherry bombs in your potion and the pot explodes! A player whose pot explodes must stop and is not allowed to draw any more chips! However, the last chip drawn is still placed in the pot.
Important!
To determine if there is an explosion, only the values on the white chips are added up. The values on the other colored chips are not counted! The actions related to the Fortune Teller cards, as well as those of the chips (see below), are not affected by an explosion.
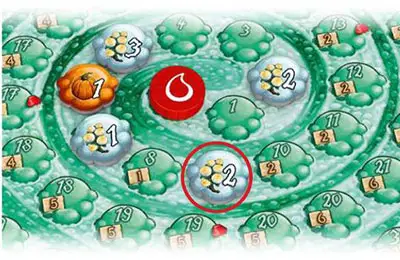
Example: Nina's white chips that are already in her pot have a total value of six (2 + 3 + 1 = 6). The orange chip is not counted. She decides to draw another chip from her bag. She takes out a white 2-chip (red circle). The total value is now 8 and her potion explodes. She places the white 2-chip but now must stop and is not allowed to draw any more chips from her bag.
Chip Actions
The chips not only fill up the pot; most of them also give you additional actions. Only the white and orange chips do not have any additional actions. Blue, red and yellow chips have a special action that is activated as soon the chips are drawn. You are also allowed to pass up on actions that you could otherwise carry out.
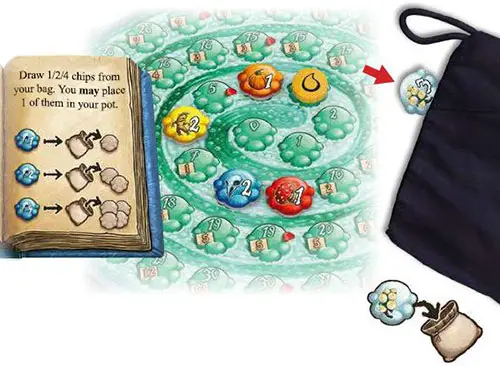
Example: Lucas draws a blue 2-chip. He places it in his pot and then he is allowed to draw 2 more chips from his bag, but can only put 1 of them in his pot. He draws a white 3-chip and a red 1-chip. Strategically, he decides to put the red 1-chip in his pot and puts the white chip back into the bag. He also could have chosen not to place either of the chips.
The actions of the green, purple and black chips can be applied only at the end of the Potions Phase (see scoring). There is a detailed description of all the actions in The Almanac of Ingredients.
Flasks
If the last chip you drew was white, you may put it back in your bag by using your flask.
Important: If the last chip drawn causes the pot to explode, the flask cannot be used!
To show that the flask has been used, turn it over so that the "empty flask" is facing up. After using the flask, you can still take out more chips from the bag. You can use it again only once the flask has been refilled (see Evaluation Phase F). That means the flask can be used only once per turn.
End Of Phase
Once everyone has decided to stop drawing chips, or has been forced to stop because of an explosion (too many white chips), the Evaluation Phase begins.
Evaluation Phase
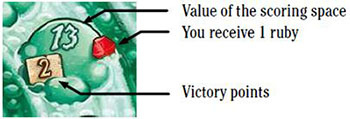
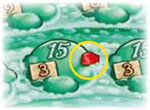
Each player's respective scoring space is the space directly after the last chip placed in their pot. When determining the scoring space, it does not matter if the last chip drawn caused the potion to explode or not.
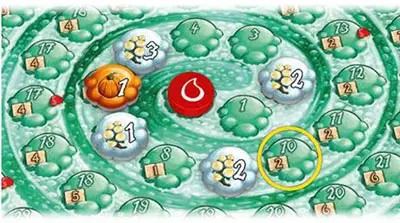
Example: The scoring space in the above example where Nina's pot exploded is space-10 (yellow circle).
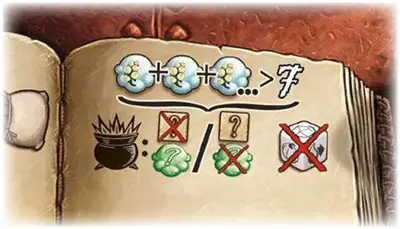
The individual steps of the Evaluation Phase are in the middle of the scoring banner. Players whose pots have exploded do not take part in Evaluation Phase A.
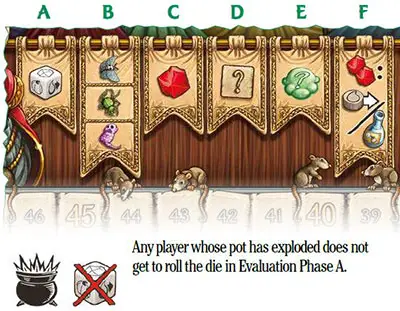
A. Bonus Die
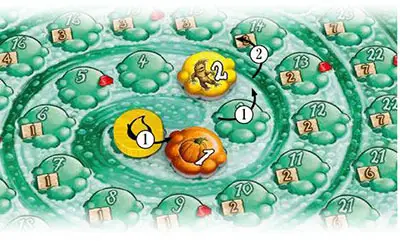
First, everyone whose potion did not explode checks to see who has reached the highest scoring space. Some spaces have the same scoring value, in which case the furthest one from space-0 is the higher scoring space. This player gets to roll the Bonus Die for a bonus. If there is a tie, they all get to roll the die.
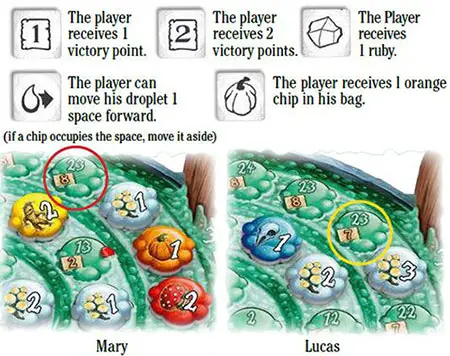
Example: Mary and Lucas have both reached a scoring space with a value of 23 and stopped before their pots exploded. However, Mary's scoring space (red circle) is higher than Lucas's (yellow circle). Mary, therefore, gets to roll the Bonus Die.
B. Chip Actions
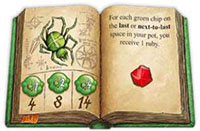
Beginning with the start player and then proceeding clockwise, each player will see if they have any black, green or purple chips in their pots and then carry out any actions or benefits of these chips. Players should check the ingredient book cards if they have any questions regarding the effects of chips.
Example: For the book shown, all players receive 1 ruby for each green chip that they have placed on the last or next to last space in their pots.
C. Rubies
All players whose scoring space has a ruby depicted on it receive 1 ruby. It does not matter if the player's pot exploded or not.
WARNING! Players whose pot exploded now have to chose between either Evaluation Phase D or E.
D. Victory Points
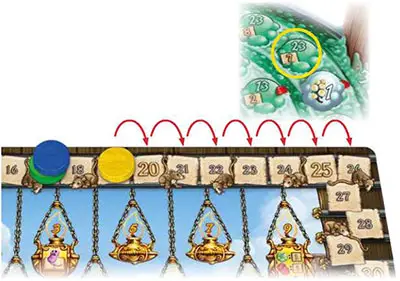
Beginning with the start player, everyone receives the victory points depicted on their respective scoring space. Move your scoring marker along the Scoring Track accordingly.
Example: Lucas's (yellow) scoring space is space-23 with 7 victory points. He moves his scoring marker 7 spaces forward.
Note: If you happen to reach the last space in your pot (33) or move past it, place the chip on the 33 and take what is depicted on the spoon. You receive 15 victory points and can go shopping with 35 coins (see Evaluation Phase E). Everyone who has reached the last and highest possible scoring space gets to roll the Bonus Die. If your pot has blown up, you do not roll the die.
E. Buy Chips
In this phase, beginning with the start player, everyone takes turns buying chips. You may buy 1 or 2 chips. If buying 2 chips, they cannot be the same color.
The number of the scoring space is the number of coins the player gets that round for buying additional ingredients. The cost of the chips is listed in the ingredient books. The number to the far left is the cost for a 1-chip, the number in the middle is for a 2-chip and the number to the far right is for a 4-chip.
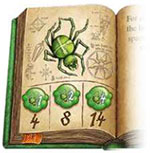
If there is only 1 number shown, that means there are only 1-chips for this ingredient. Higher-valued chips have the advantage of letting you move forward more spaces in your pot.
But they also play a role with the green and blue books, the action of which depends on the value of the chip. Any left-over coins that have not been used are lost. The number of chips is limited.
Once an ingredient has no more chips, you may not buy that ingredient.
Once everyone has finished shopping, each player puts the purchased chips into their bags along with all the other drawn chips.
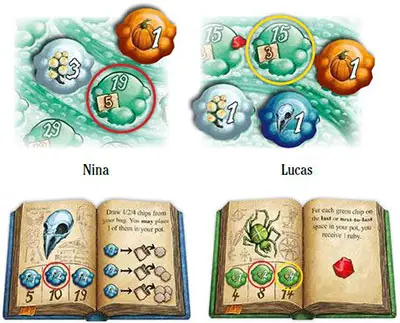
Example: Nina's pot (red) exploded after drawing the white 3-chip. Her scoring space is the 19. Lucas (yellow) stopped in time. His scoring space is the 15. As a result, Lucas gets to roll the Bonus Die. He receives a ruby, 3 victory points, and can go shopping with 15 coins.
Nina, on the other hand, has to decide if she prefers the 5 victory points or 19 coins. Nina decides to take the coins. She buys a green 2-chip for 8 coins and a blue 2-chip for 10 coins. Lucas decides on a green 4-chip. Both players lose their 1 unspent coin.
F. End Of Turn
At the end of the turn, players can carry out the following actions (more than once) by spending rubies:
-
Move their droplet forward
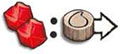
To fill their pot faster, players can trade in 2 rubies and move their droplet 1 space forward. This will give them the advantage in the following rounds of being able to place the first chip they draw out of the bag onto a higher space.
-
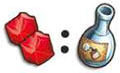
Fill up the flask
Players can fill up their flasks at the cost of 2 rubies. Turn over the flask so that it once again shows the side with a full flask. The flask can then be used in the next turn.
Each player then takes his rat stone out of the pot and puts it back on the small trivet. Pass the pile of Fortune Teller cards to the next player in a clockwise direction. That player is now the start player for the next turn. Move the Flame ahead to the next space on the Turn Indicator and start the next turn.
Turn Indicator
The Turn Indicator shows what turn it is and whether or not an action must be carried out to start the turn. On turn 9 it shows the additional actions that can be taken at the end of the turn.
Before beginning turn 2, lay out the yellow ingredient book. Before turn 3, lay out the purple ingredient book. Once an ingredient book is put out, players may then buy those colored chips during the buy chips phase (Evaluation Phase E).

Before beginning turn 6, each player has to put 1 more white 1-chip into their bag.

During the Potion Phase of the last turn, the start player gives the command "Stir!", and everyone reaches into their bags and simultaneously takes out a chip. If a player wishes to stop putting ingredients into their pot, they pull their hand out of their bag with no chip. This simultaneous action continues for all active players until everyone has either stopped pulling out chips or their pots have blown up.
Players can also decide at any time to draw simultaneously in turns 1 through 8. This prevents anyone from gaining an advantage by seeing what others have done before they decide whether they want to pull a chip out of their bag.
At the end of the last turn, you can decide to buy a victory point with either 5 coins or 2 rubies. You can repeat this as often as you like.
End of the Game
The player whose scoring marker is the furthest down the Scoring Track wins.
If more than one player shares first place, the one who was able to fill up their pot the most in the last turn wins. If it is still a tie, they can all claim to be the biggest quack of Quedlinburg.
Continue Reading

