
Components
- 1 game board
- 1 black master builder draw bag
- 1 specially marked 6-sided die
- 1 black cost marker
- 1 small black worker token
- 4 small gray worker tokens
- 4 large worker tokens
- 6 wooden cathedral pieces
- 8 wooden scoring marker discs
- 12 master builder tokens
- 28 small worker tokens
- 75 small playing cards
- 82 resource cubes
- 1 rule booklet
Setup
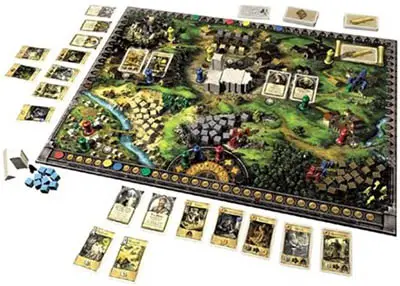
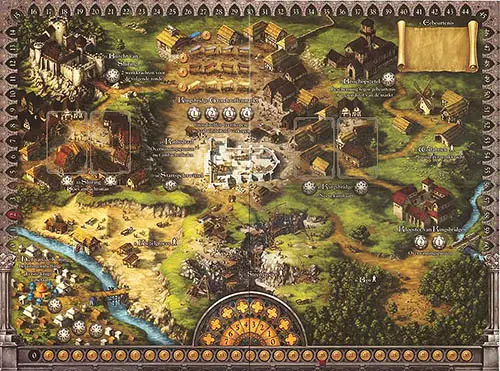
Place the game board in the middle of the table.
-
Choose a color (blue, red, yellow or green) and take the corresponding 3 master builders as well as the matching workers (7 small workers and 1 large worker). Each small figure represents a single worker. The large worker figure counts as 5 workers. Place your pieces in front of you as a reserve. Put all players' master builders in the storage bag and place the bag next to the game board.
-
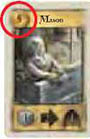
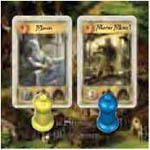
You receive 3 starting craftsman cards (with your color on their backs): a mortar mixer, a woodworker and a stonecutter. Put your craftsmen face up in front of you.

-
Take a game summary card of your color. It summarizes the elements of play and the craftsmen requirements.
-
Place the 6 large cathedral building pieces next to the game board, along with the die. The last person to visit a cathedral goes first, and takes the first piece of the cathedral-The Nave.
-
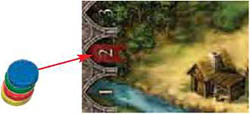
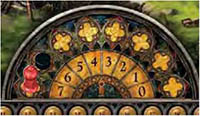
Put one of your two scoring markers on the "2" space of the victory point track surrounding the game board. Note the red ribbon.
-
The starting player puts one of his scoring markers on the "20" space of the gold track, which is near the lower board edge.
The next player clockwise from the starting player gets 21 gold, and each player clockwise gets one more gold than the player to his right received.
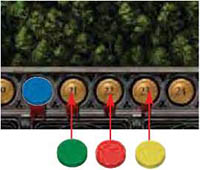
Note the red ribbons below the relevant numbers of the track.
-
Sort the 24 craftsman cards by the numbers on the card backs (1-6), Shuffle each of these 6 separated stacks (of 4 cards each) and place the stacks in order next to the board. Each round, 4 new craftsman cards will come into play, in numerical order.
-
Shuffle the 9 resource cards.
-
From the 16 privilege cards, separate the 2 cards designated for the last round. Look for the symbols in the upper comers that match the extra symbols on the backs of the cards.
Set these 2 cards aside on top of each other next to the board.
Shuffle the remaining 14 privilege cards. Remove 4 cards from the deck (do not look at them, as these cards will not be used for this game). Shuffle and place the remaining 10 cards on top of the 2 "Last Round" privilege cards.
-
Shuffle the 10 event cards. Remove 4 of them (unseen) from the game. Place the remaining 6 cards face down on the event card field in the upper corner of the game board.
-
Place the resource cubes on the resource fields of the game board. Place stone (gray cubes) in the quarry, wood (brown cubes) in the forest, and sand (white cubes) in the gravel pit.

-
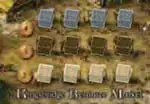
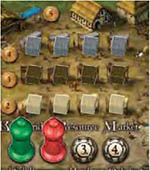
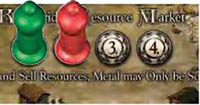
Place 4 stone, 4 wood, and 4 sand cubes on the spaces shown at the resource market.
Put sand/white on the "2" value spaces, wood/brown on the "3" value spaces, and stone/gray on the "4" value spaces.
-
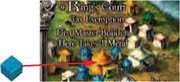
Place 1 metal (blue cube) on the King's Court (the big tent between the small blue tents). Set the remaining metal beside the game board.
-
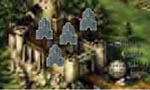
Place the 4 gray workers in the Shiring Castle area.
-
Place the black worker next to the board for now. It comes into play only through the use of a privilege card.

-
Place the black cost marker on the "7" field of the cost track.

-
Place the remaining 5 pieces of the cathedral next to the board, along with the die.

Object of the Game
The goal of the game is to score victory points. The winner is the player with the most victory points as shown on the victory point track at the end of the game. You score victory points throughout the game by contributing materials and labor to the construction of the cathedral.
Game Play
The game plays over 6 rounds. Each round represents a period of about ten years. The cathedral is finished at the end of the game.
Each round plays the same way. A round is subdivided into the following game phases:
- Selection of resource cards and craftsman cards
- Master builder assignment
- Game Board Actions (in a clockwise direction)
The decision-making part of the game occurs in phases I and II. Phase III takes little time to resolve. At first glance, this phase appears to involve many steps. If you strictly follow this phase outline, however, things move swiftly and you should avoid most problems.
Beginning Each Round
The starting player reveals the top 2 cards from the privilege card deck and places them face up on the designated Kingsbridge fields on the game board.
From the stacks of craftsman cards, take the first-round stack and reveal the top 2 cards. Place these 2 craftsmen face up on the game board on Shiring.
Place the 2 remaining craftsmen face up next to the bottom edge of the game board (note the suggested spots for the cards along the bottom edge of the game board).
Draw the top 7 resource cards. Sort them by type and place them face up next to the 2 craftsman cards. Set the 2 remaining resource cards aside, as they will not be available during this round of the game. The 2 craftsman and 7 resource cards represent the 9-card pool for the first round.


Phase I: Selection of the Resource Cards and Craftsmen
The starting player may take a card from the card pool, and then other players follow clockwise. Continue to draw cards clockwise until all cards have been exhausted, or until all players have passed.
You may pass and not take a card. The next player clockwise may then take a card. If you pass, you may no longer take cards from the pool.
When all 9 cards are taken from the card pool, Phase I ends. It also ends if all players have passed. Set aside untaken cards.
Taking a Card
Quarries generate stone, forests yield wood, and gravel pits produce sand. For each resource, there are 3 cards, which show 2, 3, or 4 resource units. Seven of these nine resource cards are available in the card pool each round, along with the two craftsman cards.
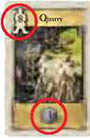
If you take a resource card, place the card face up in front of you (below your craftsman card row). You must place the required number of workers in the applicable work area on the board (in the quarry, the forest, or the gravel pit).
The number of required workers is printed in the small white figure in the upper left comer of the resource card. The number of workers needed varies from 2 (small gravel pit) to 10 (large quarry). You cannot take a card if you do not have enough workers available to fulfill the worker requirement listed on the card.
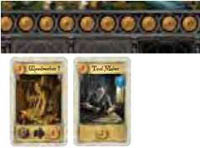
If you take a craftsman card from the pool, place it in front of you with your other craftsmen. Taking a craftsman costs gold. Its cost is shown as a number inside the gold coin in the upper left comer of the card.
Adjust your gold scoring marker down by the amount shown on the card. If you do not have enough gold to pay for a craftsman card, you may not take it.
Note: In every round, the craftsman cards become more expensive. But, they also gain more skills and increase their ability to produce victory points.
Attention: You only have 5 "cottages" for your craftsmen! You may have a maximum of 5 craftsmen in play at any one time. Three of these craftsman cottages are already occupied at the beginning of the game.
If you take a craftsman, but already have 5 craftsmen, you must discard one of your current craftsmen to make room for him. You may also just pay for, and discard, a craftsman (to prevent another player from obtaining him). Take all discarded craftsman cards out of the game.
Attention: Certain starting craftsmen allow you access to market resources and ways to earn victory points!
If you still have workers in your reserve at the end of Phase I, place them in the wool mill. These will give you gold later in the round.
Note: If you choose to take few or no resource cards during a round, you have more workers remaining for the wool mill. This balancing mechanic enables you to earn more gold, which is important since gold is tight during the game. This may be a strategy to use on occasion in the game.
Phase II: Master Builder Assignments
After you complete the distribution of the resource cards and craftsmen, the current starting player takes the storage bag, in which each player has 3 master builders.
The starting player blindly pulls the first master builder from the bag and places it next to the black cost marker. The owner of this master builder may now either assign this master builder or pass.
Attention: Once per round, the starting player may decide to return a drawn piece to the bag and then draw again (this may result in the same color/piece being drawn).
There are various fields on which a master builder may be placed:
- Archbishop's Office (protection from events)
- Kingsbridge (take a privilege card)
- Kingsbridge Priory (victory points)
- King's Court (tax exemption/metal)
- Shiring (take a craftsman)
- Shiring Castle (take 2 workers for the next round)
- Kingsbridge Resource Market (buy and sell resources)
- Cathedral (determines next starting player)

Place master builders on the round, silver master builder fields on the game board in each respective area. (Only one master builder may occupy each space on the board, and every placed builder must be on a space).
Some areas may only be occupied by one master builder (such as Shiring Castle). Other areas can be used by several builders (such as the priory).
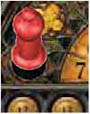
Placing the first drawn master builder on the game board costs 7 gold. This corresponds to the position of the cost marker on the cost track.
If your master builder is pulled first, you now have a choice. You may place your master builder, but you must pay the cost of 7 gold. If you do not want to pay or cannot pay the 7 gold, you may choose to temporarily pass on your placement. If you pass, set your master builder on the spot provided by the current cost on the cost track.
Each time you either place a master builder or pass, reduce the cost track value by 1. That means: the placement of the first builder drawn will cost 7 gold, the second 6 gold, the third 5 gold, and so on until the seventh placement only costs 1 gold.
Remember: Always pay the cost when you actually place a master builder!
After the current player draws the seventh master builder, all subsequent placements are free!
Important: In a 2-player game, set the cost marker to "0" after you draw all 6 master builders.
-
If you decide to place a master builder on a location, you must pay the current cost shown on the cost track (7 for the first placement of the round). After you either place or pass, move the cost marker down 1 space on the cost track, decreasing the cost of the next master builder placement.
Then pull the next master builder from the storage bag. The player whose master builder is drawn now has the choice to place his master builder for the current price according to the cost track, or pass.
-
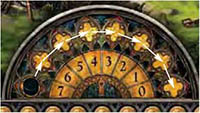
If you decide to pass on the placement of your drawn master builder, place the master builder on the cost track on the field above the current value.
Example: The Red player passed at 7 gold. Move the cost marker to "6" and place the red master builder on the "7" field.
After the current player draws all the master builders from the bag, place each master builder that was "passed" on a board location for free.
Place the master builder furthest to the left on the cost track (next to the highest value) first, then the next master builder that was "passed" on, etc.
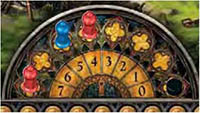
Example: The Red player passed first, then the Blue player, and then the Red player again. Therefore, Red may now place his master builder cost-free on a master builder field, then Blue and then Red again.
Attention: Due to an event card, it may happen that only 2 master builders of each color may be played. If this should happen, place the third master builder of a color drawn next to the game board and draw another master builder.
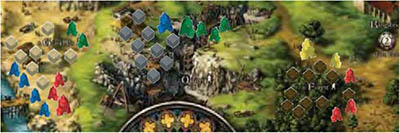
Phase III: Game Board Actions
In this phase, the players resolve the actions listed on the game board. Each of the areas on the board is numbered. Resolve the areas in numeric order (clockwise on the board). After resolving an area, place the master builders from that area back in the bag.
1. Reveal The Top Event Card
After all master builders have been placed in phase II, the starting player draws the top event card and reads it out loud. Resolve the event immediately.
There are positive events (with a seal) and negative events (without a seal). An event usually affects all players.
A negative event (without a seal) affects all players, except perhaps the player who placed a master builder in the Archbishop's Office this round. That player may choose to be immune from the negative event's effects.
Note: One event card requires the players to pay 4 gold. If you cannot pay 4 gold, you must pay as much as you have. For every 2 gold that you are short, you lose 1 victory point. If you are short an odd amount of gold, the victory points lost are rounded down in your favor.
2. Archbishop's Office: Protection from events
If you placed a master builder with the archbishop, you may either protect yourself from a negative event card this round or, regardless of the event card drawn, take a resource from the resource market (not from the resource fields on the game board!).
Note: If a player loses a craftsman due to the effects of an event card, remove the craftsman from the game.
3. Wool Mill: Collect Income
Each player receives his wool mill earnings.
You receive 1 gold for each worker that you placed in the wool mill at the end of Phase I. Move your gold scoring marker as applicable. Put these workers back into your reserve.
Note: You may not have more than 30 gold (you lose any gold earned above 30).
4. Kingsbridge: Take a Privilege Card
If you placed a master builder at Kingsbridge, take the privilege card corresponding to your builder's placement.
If two master builders are placed there, both privilege cards will be taken. If one or both fields at Kingsbridge are unoccupied, discard the corresponding privilege.
5. Kingsbridge Priory: Victory Points
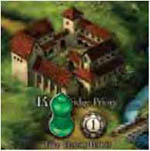
The first player to place a master builder in the Priory receives 2 VPs. Placement on the second field yields 1 VP Adjust the victory point track accordingly.
6-8. Claim Resources
The workers in the quarries, the forests and the gravel pits now produce their resources. You receive 2-4 resources as marked on each of your resource cards.
Take the resources from the appropriate resource fields on the board (NOT the market) and add them to your own supply. Discard the resource cards and add them to the leftover cards from Phase I.
They are ready for use in the next round. Put your workers back into your reserve for next round.
Note: There is one privilege card each for wood, stone, and sand. Each card generates an income of 1 specific additional resource from the resource fields.
Note: In the very rare case that you produce resources and there are none available in the supply, simply note the resources that you are owed and use them as required. Do NOT take them from the market!
9. King's Court: Tax exemption/metal
The King requires taxes from the players. The amount of the tax varies from round to round, depending on the King's moods.
The starting player rolls the die. The taxes for the round equal the value shown by the die. The values of the tax range from 2 to 5.

You pay the taxes established for the current round (2-5 gold) and decrease your gold scores on the gold track as applicable.
Exception: Each player that placed a master builder in the King's Court is exempt from taxes in this round and pays nothing.

The first player to put a master builder in the King's Court (on the field beside the metal cube) receives a free metal resource, in addition to the exemption from taxes. Remove the metal from the board and place it in front of that player.
Attention: If you cannot pay your taxes, you must pay the difference with your victory points. For every 2 gold in unpaid taxes, subtract 1 victory point. Round odd amounts of gold debt down in your favor.
10. Shiring: Take a Craftsman
If you placed a master builder on Shiring, you receive the craftsman card associated with your placement. Take the craftsman and put it in your row with your other craftsmen (remember the 5 craftsmen limit).
Unlike choosing craftsmen at the beginning of a round, you do NOT have to pay for these craftsmen! Remove the craftsmen remaining at the end of the round from the game.
11. Shiring Castle: Take workers for the next round
If you placed a master builder at Shiring Castle, you receive 2 gray workers. Add these to your worker supply.
In the next round, you will have 2 more workers for the use of resource card fulfillment or the wool mill. Return these workers to the supply at the end of the next round.
12. Kingsbridge Resource Market: Buy and sell resources
In the sequence (fields 1 to 4) that master builders were assigned to the resource market, players may take actions at the market. In order, players continue to take actions, as long as players want to take actions or until all have passed.
Each player may take several actions with a single master builder placed at the resource market!
An action is either the purchase or the sale of a resource type.
If you buy a resource, take the quantity of one type of resource that you want from
the market and place it in front of you (in your supply). There are never more than 4 cubes of any one resource available per round. Pay the cost immediately by moving your gold scoring marker down for the amount purchased. Each stone costs 4, each wood 3, and each sand 2 gold.
Note: You cannot purchase metal at the resource market!
If you sell resources, sell as many resources of one type from your supply and add them to the appropriate resource field (not the market). Collect gold for your sale by moving your gold scoring marker up as applicable. You receive for each individual resource sold: 5 for metal, 4 for stone, 3 for wood, and 2 gold for sand.
If it is your turn and you do not want to take an action, you pass by placing your master builder back into the bag for use in the next round.
Example: The Green player wants to buy wood. Since he only has 7 gold, he buys 2 wood and moves his gold score back 6 gold. Then Red, who only has 2 gold, sells 1 stone for 4 gold. Then Green sells 1 metal for 5 gold.
Now it's Red's turn again and she buys 2 wood for 6 gold. With this, the wood is sold out. Therefore, Green buys 3 sand and pays 6 gold. Red passes and removes her master builder from the market. Green then also passes.
Note: If no one places master builders at the resource market, no resources can be purchased and no resources can be sold.
Note: You may not buy and sell the same resource type in the same round (in order to keep other players from buying a resource).
13. Cathedral: Victory Points from craftsmen
At the end of a round, each player can contribute to the building of the cathedral.
To do this, your craftsmen use resources to score victory points. The starting player scores first, and then each of the other players does the same in clockwise order.
How many and which resources are converted to victory points depends on your craftsmen and their abilities. (Refer to the craftsmen section in the right hand column).
First, you choose which resources you want to use in the construction of the cathedral this round. Then, score victory points by moving your scoring marker on the victory point track according to the performance of your craftsmen. Finally, return all of the resources you just used for the building of the cathedral to the resource fields.
Should the victory track not go high enough towards the end of the game, continue around the comer and add 60 points to your final score.
Note: You may not carry over more than 5 resources to the next round. Surplus resources must be discarded without effect.
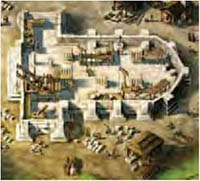
To conclude the round, the starting player puts a cathedral component on the construction site.
At the end of the game, after the sixth piece is placed, a beautiful cathedral will exist on the game board!
14. Change Starting Player

If a player placed a master builder at the cathedral, he becomes the new starting player. If the master builder field is empty, the starting player rotates one seat clockwise. The new starting player takes the next cathedral building block.
Note: The starting player has the advantage in choosing resource and craftsman cards. He may also put 1 drawn master builder back into the bag once per round (perhaps delaying its appearance).
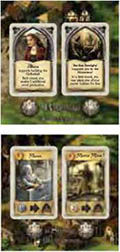
The Privilege Cards
The privilege cards, which the players get in Kingsbridge, are usually self-explanatory. There are 3 types:
-

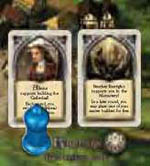
Cards which, for the remainder of the game, stay in effect. Each of these cards represents a patron who supports the player (e.g., "Each round, you receive 1 additional wood production").. Place each of these cards in front of its owner for use until the end of the game.
-

Cards that may be used only once during the game at the player's discretion (e.g., "In any one round of your choice, you pay no taxes..").. Each of these cards stay in front of its owner until used, and then is removed from the game.
-

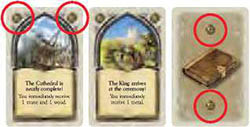
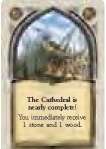
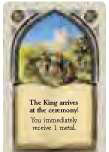
Cards that must be used immediately and discarded (e.g., "You immediately receive 8 gold")..
Attention: Before the last (sixth) round, always put the following 2 privilege cards at Kingsbridge: "You immediately receive 1 metal" and "You immediately receive 1 stone and 1 wood".
Before the next Round
Do the following before the next round begins.
- Restock the resource market (it should start with 4 stone, 4 wood, and 4 sand).
- Place a metal at the King's Court (if one is not there currently).
- Return any 2 gray workers purchased on the previous round to Shiring Castle.
- Return the cost marker on the cost track to the "7" space.
- Put 2 new privilege cards face up on Kingsbridge.
- For the upcoming round, put 4 craftsmen into place: randomly choose and place 2 by the materials, and place the other 2 face up at Shiring.
- Shuffle the 9 resource cards. Combine the top 7 cards with the 2 craftsman cards and place them at the bottom board edge.
End of the Game
The game ends after the sixth round. The winner is the player with the most victory points.
If there is a tie, the tied player with the most gold wins. Otherwise, the game ends in a tie.
Continue Reading


