The Invader goal is to breach at least one Wall Section before the end of the 7th turn.
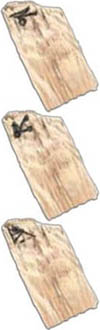
Invader Units
The Invader has the following Unit types at his disposal:
 Goblin - Strength 1
 Orc - Strength 2
 Troll - Strength 3
Actions
The Action cards define the abilities available to the Invader during the game. The Action cards must be resolved from left to right in ascending order of their Phase numbers:
- Phase 1 - supplies
- Phase 2 - machines
- Phase 3 - equipment
- Phase 4 - training
- Phase 5 - rituals
- Phase 6 - maneuver

Each Action card presents a unique action available to the Invader and the rules corresponding. For a more detailed explanation of each action, see Invader Actions Explained in the supplement.
The Invader may perform any of these Actions - all of them, some of them or none. The Invader must have the required amount of Units and Wood available in his supply to pay for every Action used. Place these resources on the Action card to mark that it has been used. Each Action may only be performed once per Turn and only in order from left to right. Once an action has been used or skipped over, the Invader may not perform that action again this turn.

The Defender receives 1 Hourglass for every Unit the Invader spends. Most actions can be completed faster by spending stronger Units or more slowly by spending weaker Units.
Eexample: The Invader can build a Catapult by assigning 1 Troll (strong, faster at building) or 2 Goblins (weaker, slower at building) to this task. The Defender would then receive 1 or 2 Hourglasses respectively.
Some actions show an Hourglass in the cost. This indicates an additional requirement to pay the Defender a number of Hourglasses in addition to any Hourglasses required from spending Units. After the Invader performs an Action, the Defender must spend all the Hourglasses in their supply (if any). After all Hourglasses are spent, the Invader proceeds with the next Action.
The game proceeds back and forth in this manner through all 9 Action cards and then the Assault commences. After the seventh turn, the game ends.
Note: Actions must be paid with Units and Wood from the Invader's Supply. If the Invader does not have enough resources available in his Supply to pay for an Action, that Action may not be taken. Units already on the board may not be used to pay for Actions.
Objectives
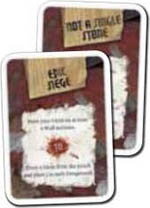
At the start of the game, the Invader draws 2 Objectives which may provide small benefits in this game. Each Objective has a goal and a benefit. When the goal is met, the Invader must resolve the benefit section of the card. Most Objectives are discarded after they are resolved, but a few stay in play for the remainder of the game.
NOTE: Blood Magic, Not A Single Stone, and Devoted Warlocks remain in play once they are fulfilled. All other Objectives are discarded.
INVADER ACTIONS:
The following is a brief summary of all actions available to the Invader during each phase. For a more detailed explanation of each action, see Invader Actions Explained in the supplement.
Phase 1: Supplies
In Phase 1 the Invader receives Units and Wood. These make up the Invader's Supply.
Briefing
First, the Invader receives new resources:
New units - The Invader draws 14 Units from the pouch at random.
Note: These units are placed in the Invader's supply and are used to pay for future actions. Unspent units may be moved during Phase 6 - Maneuvers.
Wood - The Invader receives 5 Wood.
There is no cost for receiving these resources.
Note: In the first Turn of the game the Invader has additional 5 Wood as defined in the section "INVADER PREPARATIONS".
Then the following action is available:
Exchange Phase Cards
Cost: 1 Hourglass (to the Defender)
Effect: The Invader may exchange any number of Action cards with those available in his supply. The Phase 1 and 6 cards may never be exchanged.
Note: Phase cards of the same Phase number may be rearranged by taking this action.
Note: During the first Turn of the game, the Invader may only exchange the Phase 2 and 3 Action cards with the Phase 4 and 5 cards that were drawn and set aside. These cards make up the Invader's supply of Action cards. Actions that have been exchanged out are added to the remaining supply for future Turns.
Resources
Effect: The Invader may: discard 1  to gain Additional 1
  or discard 1
  to gain Additional 2 or discard 1
  to gain Additional 3 .
Note: The Invader can acquire up to 8 Wood per Turn (5 + 3 if a Troll is used for the Resources action).
Phase 2: Machines
The Invader may assign Units and Wood to build Siege Machines. When built, place the corresponding Siege Machine token on an appropriate spot on the board. There are 5 types of Siege Machines in the game. The Ballista, Catapult, and Trebuchet are barrage weapons which attack the Stronghold.
When built, the Invader constructs a Machine card deck of 2 Hit and 4 Miss cards, shuffles them, and places them face-down on the Machine tile.
Note: The maximum number of Barrage Weapons (Ballista, Catapults, Trebuchets) on the board during the game is 4.
Ballista
Location: Rampart +Effect: May fire at any Wall section connected to this Rampart.
Kill 1 Defender and 1 Invader unit on the target Wall section.
Catapult
Location: Rampart +Effect: May fire at any Wall section connected to this Rampart.
Destroy 1 Wall component on the chosen Wall section. If there are no components, destroy a Cauldron instead. If there are no Cauldrons, target the Tower (removing a Cannon/Pole/Bay Window placed there).
Trebuchet
Location: Foreground.
Effect: May fire at any Wall section on this side of the Stronghold.
Destroy 1 Wall component on the chosen Wall section. If there are no components, destroy a Cauldron instead. If there are no Cauldrons, target the Tower (removing a Cannon/Pole/Bay Window placed there).
Mantelet
Location: Rampart +Effect: Marksmen attacks have no effect at this Rampart.
Siege Tower

Location: Foreground Effect: The Siege Tower moves like any other Unit. Wall Components and Cauldrons are not resolved during a combat where the Siege Tower is present.
Note: Siege Machines can be sabotaged by Scouts and stopped by Traps.
Phase 3: Equipment
In addition to constructing Siege Machines, the Invader provides his Units with powerful equipment. Each Wall section may hold a maximum of 2 different equipment tokens, 1 on each space provided. There are 5 Equipment types available:

Banner
Location: Wall section +Effect: +1 Melee Strength at this Wall section.

Ladder
Location: Wall section +Effect: +1 Unit space at this Wall section.

SAP Location: Wall section +Effect: The Invader may move 1 or 1 from his Supply to this Wall section during Maneuvers.

Bridge
Location: Path with no Traps present.
Effect: The Defender may not place Traps on this path.

Poison
Location: Wall section +Effect: 1 Marksman dies at this Wall section before Melee combat if the Invader has at least 1 Unit present.
Phase 4: Training
When the Units are equipped, the Invader may proceed with their Training. Up to 2 different Training counters may be present at each Rampart on the appropriate spots (this rule does not apply to the Artilleryman, Trainer and Saboteur Trainings - see their descriptions).
There are 5 Training types available:
Artilleryman
Effect: Remove 1 Miss card from any Machine and reshuffle the Machine card pile.

Quartermaster
Location: Rampart +Effect: During Maneuvers one Unit may ignore this Rampart and proceed directly to the Walls.

Trench Master
Location: Rampart +Effect: Cannon attacks have no effect at this Rampart.

Saboteur
Effect: Actions at a chosen Defender Building cost +1.
Trainer
Effect: Draw 2 . Place them on any Foreground
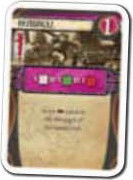
Phase 5: Rituals
The Invader may also use the power of shaman Rituals to help capture the Stronghold.
Rituals effects are only temporary. When the Turn ends, all Ritual tokens are removed from the board and returned to the Invader's supply. The Ritual may be performed again in future turns by paying the appropriate cost.
There are 3 tokens for each Ritual: 1 Target, and 2 Bluff. Each time a Ritual is selected, the Invader places up to three corresponding tokens on up to three different spaces face down as required by the Ritual. The Defender has no knowledge which space is the true target.
Rituals trigger when the Action (or space) they are on is used. Flip the token over and check the result: Bluff, or Target. A bluff does nothing and is discarded to the Invader's supply. A Target means the ritual is resolved and the token remains on the board until the end of the turn.
There are 5 Rituals available:

Bloodstones
Location: Siege machine Effect: When the Target Siege Machine hits a Wall, kill +1 Defender Unit.

Possession
Location: Hero Order token +Effect: When the Target Hero Order is activated, remove the Order from the game without resolving it.

Demon
Location: Buildings +Effect: When the Defender performs an action in the Target building, kill 1 Unit in the Courtyard.

Specter
Location: Wall sections +Effect: Defender Units killed at the Target Wall section are placed on the Foregrounds as Invader Units of equal strength.

Gale
Location: Wall Sections +Effect: Sending Defender Units to or from the Target Wall section costs +1.
Phase 6: Maneuver And Orders
All remaining Units not used by the Invader in previous Actions may be sent to attack the Stronghold. Any Invader Units which are on the Walls may be issued Orders. Unused Units remain in the Supply.
Movement Of Units
The Invader has two Maneuver Actions available: Minor and Major. Both Actions send a number of Units from the Supply to the Foregrounds and move Units which are already on the board. The Units can only move along the Paths shown on the Board. Units may only move to a location if there is a space available.
Exception 1: The Defender receives Hourglasses for Phase 6 Actions after ALL maneuvers were done and the Orders were given (not separately after minor and then major Maneuver Actions).
Exception 2: At least one of the Maneuvers has to be performed each round.
Minor Maneuver
Effect: The Invader may move up to 5 Units from each Rampart to attached Wall sections, and 5 Units from each Foreground to connected Ramparts. Additionally, up to 5 Units may be moved from the supply to each Foreground, for a total of 10 new Units on the board.
Major Maneuver
Effect: The Invader may move up to 7 Units from each Rampart to attached Wall sections, and 7 Units from each Foreground to connected Ramparts. Additionally, up to 7 Units may be moved from the supply to each Foreground, for a total of 14 new Units on the board.
The Invader may perform either Maneuver, or both, but may only perform each Maneuver action once. The Major and Minor Maneuver have to be taken one at a time, for example, first take a complete Major Maneuver and then a complete Minor Maneuver. Moving Units are moved in the following order:
- Sap Units to the Walls
- Ramparts to the Walls
- Foreground to the Ramparts
- Supply to the Foregrounds
Note: The board Paths on the bottom right side of the Stronghold (Defender's view) requires Units to move through one Rampart before reaching the outermost Rampart. Invader Units move in the following order: first from the outermost Rampart to a connected Wall section, second new units from previous Rampart may come there.
Check the Maneuvers examples on the next page and in the Examples section on page 14.
Marauders
On the right side of the Stronghold (Defender's view), there are Marauders between the final two Ramparts. During both the Minor and Major Maneuvers, if the Invader moves any unit to the final Rampart, two Marauders join the attack. The Invader draws 1 Green and 1 White cube from the pouch and adds them to the last Rampart.
Note: The Maneuver Action allows the Invader to move any mix of Units from both Foregrounds, all the Ramparts, as well as from the Supply. The Invader MAY NOT withdraw Units from the Walls. These rules may be modified by Action cards.
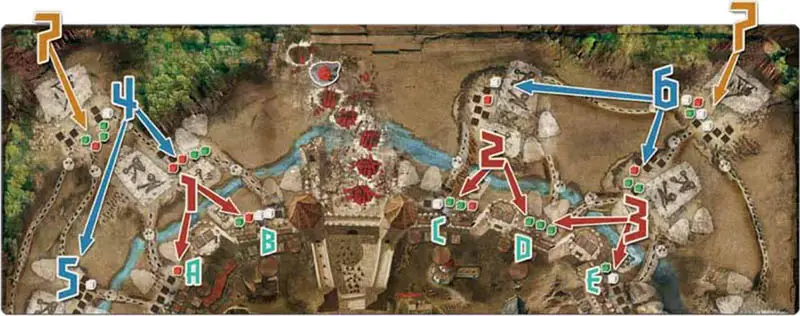
Example Of A Minor Maneuver
The Invader plays the Minor Maneuver Action: 3 Hourglasses are given to the Defender. The Invader moves 5 Units from the Rampart 1: 1 Unit to the Wall section A and 4 Units to the Wall section B. The Invader also moves 5 Units from the Rampart 2. 4 go on the Wall section C and 1 to the Wall section D on the right.
Other two Units come here from the Rampart 3. No more Units can be moved to the Wall section D since there are only spaces for 3 Units. Additional 2 Units from the Rampart 3 are placed on the Wall section E, so the Invader moved 4 Units total from Rampart 3.
Now the Invader moves 5 Units - which is the maximum for the Minor Maneuver - from the Foreground 4 to the following spaces: 4 Units t o the Rampart 1, and 1 to the Rampart 5.
5 Units are also moved from the Foreground 6: 2 to the Rampart 2 and 3 to the Rampart 3.
Finally the Invader moves the maximum number of Units (during a Minor Maneuver) to the Foregrounds 4 and 6 (step 7): 5 for each.
Orders
The Invader may now give Orders to Units engaged in combat. If possible, at least one Invader Unit must carry out the given Order. If all Units die at a Wall Section with an Order present, remove the Order from the game without resolving the effect.
Note: The board has no special spaces for Orders; the Order tokens should be placed at the chosen Wall section in such a way that there are no doubts which Wall section they affect.
There are two ways the Invader may issue Orders. Only one of these methods may be used each turn:
Open Order
Cost: none Effect: The Invader places one Order token face up at a chosen Wall section.
Classified Orders
Cost: 1 Hourglass (to the Defender) Effect: The Invader places any number of Order tokens face down and flips them face up only during the Assault. Only one Order counter may be placed on each Wall section.
There are four Orders available:
Goblin Fury
Effect: The Goblins go berserk. The Strength of each Goblin at this Wall section is 3. After the Assault all goblins here are killed. You will find a Goblin Fury play example in the Assault section.
Note: If the Strength of the Goblins is enough to win the combat and break into the Stronghold, they will do so even if there are no other Invader Units on that Wall section. If the Defender has the Advantage on the Wall in combat, the affected Goblins are removed from the board before Invader's losses are calculated.
Orc Detonation
Effect: At least one of the Orcs detonate.

The Invader removes any number of Orcs at this Wall section. Each Orc removed destroys one Wall component at this Wall section. Detonated Orcs are removed from the board before the Assault is resolved.
Call Of The Trolls

Effect: If the Invader has a Troll at this Wall section, the Call of the Trolls may be used to order another Troll on this side of the Stronghold to Maneuver. The called Troll must immediately move one step towards the Wall section where the order has been given.
Note: The Troll Trap affects the Called Troll as normal.
Bluff Counter
Effect: The Bluff counter is used to mislead the Defender and does not modify any attributes or Actions of the Units.
End Of Maneuvers
When the Invader ends Maneuvers and Orders and the Defender spends all remaining Hourglasses, the Assault begins.
Continue Reading
