
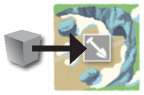
After establishing themselves in Honshu, the lords and ladies head north to Hokkaidō. Beholding Hokkaidō's mountainous landscape, they see that expansion on this land will prove to be a greater challenge than before.
Hokkaido is a game of Hokkaido consists of 12 rounds, each divided into two separate phases. Each player must expand their personal map to maximize their scoring possibilities.
Components
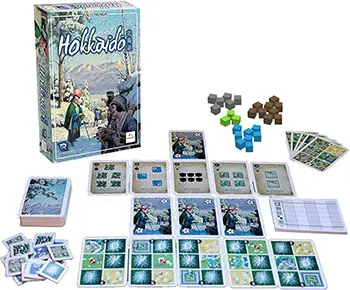
- 56 Resources (14 of each type)
- 15 Terraforming Tiles (double sided)
- 6 Starting Province Cards (double sided)
- 60 Map Cards (numbered 1-60)
- 5 Scoring Summary Cards
- 9 Goal Cards (optional variant)
- 1 Score Pad
- Instructions
Setup
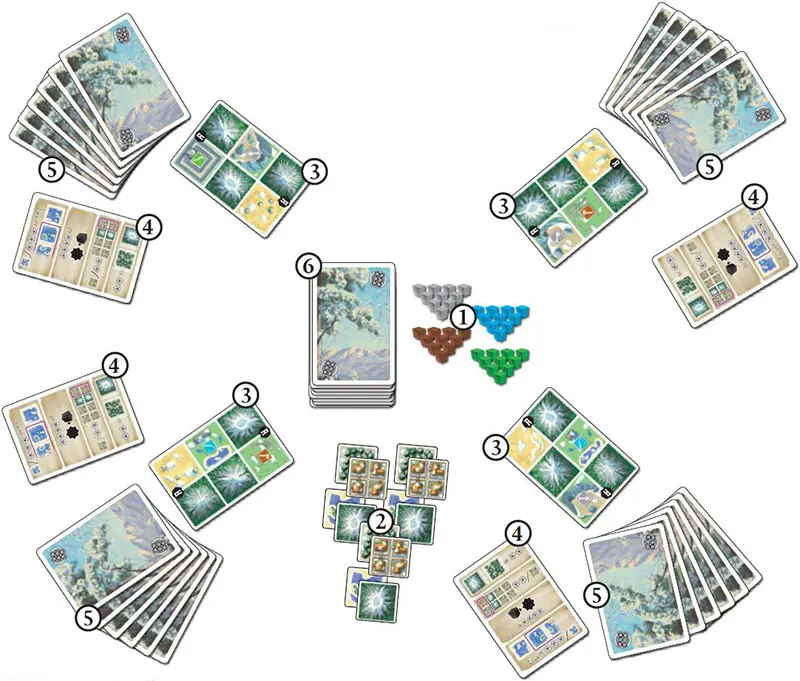
1. Place the resources 1 and Terraforming tiles 2 in the center of the playing area to form a common pool. The number of resources is limited to the number of components included in the box. Terraforming tiles should not run out, but if they do, use any suitable component as a replacement.
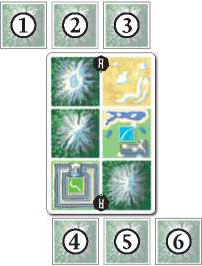
2. Players collectively decide whether they want to play with the A or B-sides of the Starting Provinces. Deal one random Starting Province to each player 3 with its chosen A or B-side face up. Place a matching resource on each of the production squares on the Starting Province cards. The Starting Province card is the first card in each player's respective map. Give one Scoring Summary card 4 face up to each player.
3. Shuffle the Map cards and deal 6 cards face down to each player as their starting hand 5. Do not show these to the other players. Place the remaining Map cards in the center of the playing area, forming a draw pile 6.
You are now ready to play the game.
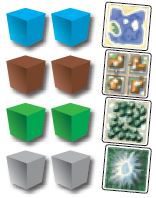
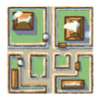
Resources, production squares, and factories:
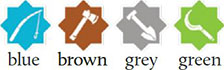
Resources:

Production symbols:

Factory symbols:
Game Play
The game is played over 12 rounds. Each round consists of a Drafting Phase and a Map Phase.
Drafting Phase (3 to 5 Players)
Players simultaneously pick 1 card from their hand and place it face down next to their map. Pass the remaining cards face down to the next player-clockwise in rounds 1-6, and counterclockwise in rounds 7-12.
Players should not look at the cards just passed to them. Once all cards have been passed, players move to the Map Phase.
Drafting Phase for 2 players
Players simultaneously pick 1 card from their hand and place it face down next to their map. Then, they draw 1 card from the draw pile into their hands.
Both players now discard 1 card from this new hand and pass the rest of the hand face down to the other player. After the cards have been passed, players move to the Map Phase.
Drafting Phase variants
If you are familiar with Honshu, you may choose to replace the Drafting Phase in Hokkaido with the Card Selection Phase from Honshu. Similarly, when playing Honshu, you could also try Drafting for a change.
Map Phase
In the Map Phase, players expand their maps by placing the card they drafted from the previous Drafting Phase.
Each player must add the Map card to their respective map so that at least one square of the new card is either on top of or hidden under a previously-placed Map card, and at least one square of the new card still remains visible. Cards may be placed horizontally or vertically.
In the Map Phase, all players play simultaneously. However, if a player does not want to place their card until another player places first, they must say before anyone places.
Then, the player who drafted the card with the lowest value places their card first, and all other players play sequentially in low-to-high order.
Production Squares
If the newly-placed Map card has any production squares, a single matching resource from the common pool is placed on each of them.
If a player places a card on top of a production square that still has a resource, that resource is discarded to the common pool.
Mountains
Each player must have a single Mountain Range on their map.
When players choose a new Map card containing Mountain squares, the Map card must be placed so that it continues the single Mountain Range.
The placed Mountain square may extend the Mountain Range orthogonally or diagonally (as seen on the right), but cannot be placed in a way that branches the Mountain Range in two.
All Mountain squares must always remain visible and cannot be hidden under other cards.
Note: During final scoring, the Mountain Range divides the map into two separate sides. This is important for Town scoring.
Terraforming
Once each Map Phase, each player has the option to terraform exactly 1 Desert square on their own map. This may be done before or after the drafted card has been placed onto the map.
To do so, a player must discard 2 resources of the same color from any of their production squares to place a Terraforming tile on a Desert:
- 2 blue resources turn a Desert square into a Lake
- 2 brown resources turn a Desert square into a Town
- 2 green resources turn a Desert square into a Forest
- 2 grey resources turn a Desert square into a Mountain
For the remainder of the game, the Terraforming tile counts as the corresponding square for all placement and scoring purposes.
If a Town or Forest Terraforming tile gets covered up during a future Map Phase, return the tile to the common pool.
Consecutive Rounds
After all players have completed the Map Phase, the players pick up the cards that were passed to them, and a new round begins.
After the sixth round, deal 6 Map cards from the draw pile to each player as their new hand. After 12 rounds, the game ends and final scoring takes place.
Summary of Terrain Squares
Production Squares:

During the Map Phase, each new production square receives a resource of the same color from the common pool. These resources can be used for Terraforming during Map Phases or moved to matching Factories during final scoring.
Factory:

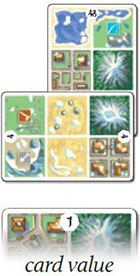
During final scoring, each unused resource still left on production squares can be scored by moving it to a matching Factory. Each resource moved this way is worth  .
.
Exception: exactly one of the B Starting Province cards has Factories of a lower value:  ). Each Factory can receive at most one resource.

Forest:
During final scoring, each visible Forest square is worth
Desert:

Deserts can be terraformed during Map Phases, but otherwise have no effect during the game.
In case of a tie in final scoring, the player with the most non-terraformed Deserts visible on their map wins.
Lake:
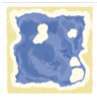
In the Map Phase, Lake squares must always remain visible and cannot be covered by other Map cards.
During final scoring, each orthogonally-contiguous area of Lake squares is scored. In every such area, the first Lake square is worth 0  , and each consecutive Lake square is worth
  .
.
Mountain:

In the Map Phase, Mountain squares must always be placed so that they continue the single Mountain Range. Mountain squares must always remain visible and cannot be covered by other Map cards.
During final scoring, each Mountain square is worth .
Town:
During final scoring, the Mountain Range divides the Map into two sides. On both sides, count the size of your largest orthogonally-contiguous Town area. Each Town square in the smaller of these two Town areas is worth .
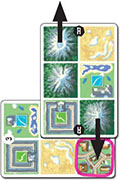
Note: During final scoring, both ends of the Mountain Range are considered to continue indefinitely in a straight line.
Any Town squares located on this imaginary line (see the image on the right) are excluded from the scoring.
This effect applies to Town squares only.
Optional Rule: Goal Cards
During setup, add the following new step:
4. Shuffle the Goal cards. Randomly draw two more Goal cards than the number of players and place them face up on the table. Return the unused Goal cards to the box.
At the end of each round, all available Goal cards are checked in ascending numerical order:
To fulfill a Goal, at least 3 different cards on a player's map must contribute to the Goal's requirements (exception: Goal #9). These 3 cards may include a Starting Province card.
 If only one player has fulfilled the Goal, the player claims it, placing it next to their map.
If two or more players have fulfilled the same Goal, check the Goal card for the tiebreaker. The order of breaking ties is shown below the number of the Goal card: For Goal cards 1-4, the player who drafted the Map card with the lowest value wins the tie.
For Goal cards 5-9, the player who drafted the Map card with the highest value wins the tie.If any player was tied for one or more fulfilled Goals, but did not receive a Goal card this round, they may immediately take any single Terraforming tile for free and place it on a Desert square on their map.
Very Important
Once a player has received a Goal card, they cannot receive any more Goal cards or Terraforming tiles this round.
If all Goal cards have already been fulfilled during previous rounds, this phase is skipped. During final scoring, each fulfilled Goal card is worth .
- First to have 5 separate Forest areas.
- First to have a size difference of 5 Town squares between their largest Town areas on each side of the Mountain Range. (Must have at least 1 Town square on both sides).
- First to have 3 separate Lake areas.
- First to have 5 orthogonally-adjacent Mountain squares.
- First to have 6 resource cubes present on their map.
- First to have all 4 types of production squares.
- First to have all 4 types of Factory squares.
- First to have 3 orthogonally and/or diagonally-adjacent production and/or Factory squares. O First to have terraformed twice.

End of the Game
Players score their maps based on their visible Mountains, Forests, Factories, Lakes, and Towns.
For each Mountain square, the players score
.For each Forest square, the players score
.For each Factory square that can be given a resource from a matching production square, the players score
.
The first Lake square of each lake area is worth 0 @f1.jpgand each consecutive square is worth .
On both sides of the Mountain Range, count the size of your largest Town area. Each Town square in the smaller of these two areas is worth .
Note: For Town scoring, both ends of the Mountain Range are considered to continue indefinitely in a straight line. Any Town squares located on this imaginary line are excluded from the scoring.
The player with the most wins the game.
In case of a tie, the player with the highest number of visible Deserts wins the game.
Continue Reading
