Components
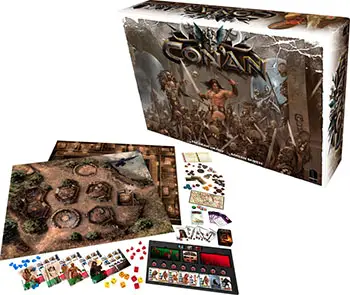
- 74 plastic miniatures
- 1 Book of Skelos
- 148 tokens
- 2 double-sided game boards
- 45 tiles
- 55 cards
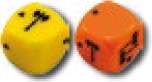
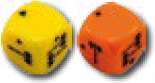
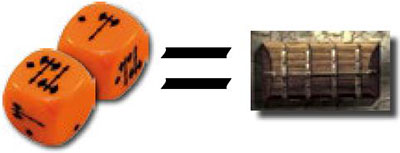
- 9 dice
- 4 hero sheets
- 75 plastic gems
- 25 plastic bases
- 4 game aids sheets
- 1 track sheet
- 1 heroes rulebook
- 1 Overlord rulebook
Overview
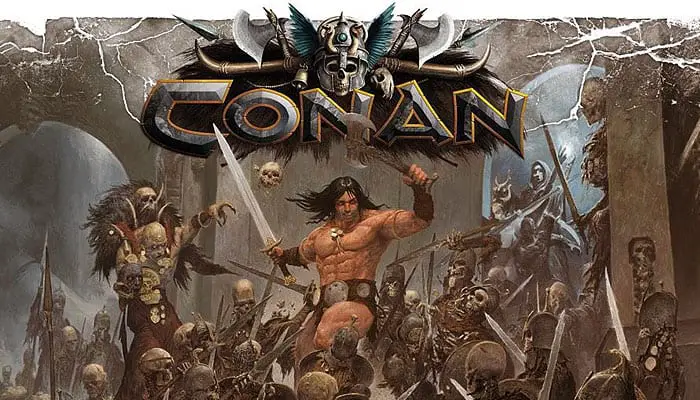
Conan is a miniatures board game for 2 to 5 players in which you join the famous barbarian in his adventures and relive his most glorious battles through an asymmetric and open gameplay system.
Each game pits two sides against each other: one player takes on the role of the "Overlord" and controls evil hordes to carry out his vile plans, while the other players embody different unique heroes who cooperate to achieve their goals.
Each game of Conan revolves around a scenario. Each scenario details the location it takes place in, the mission's context, the necessary setup instructions, as well as the objectives for either side to achieve victory.
Each hero has a character sheet that allows them to control their model on the battlefield by performing various actions such as moving, fighting, defending or picking a chest lock.
The heroes must play cooperatively to perform their actions in the most efficient way possible while defending themselves from the Overlord's onslaught.
Unlike the heroes who each control a single protagonist, the Overlord uses a tablet, called the Book of Skelos, which allows them to control a multitude of characters.
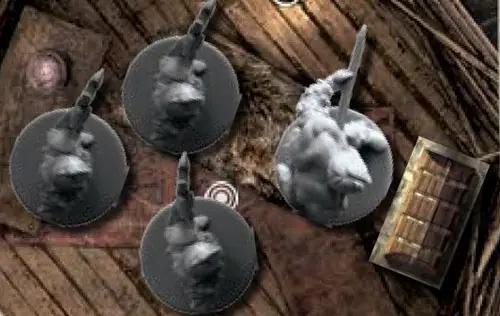
The Overlord's units are represented by tiles that regroup models whose attributes are identical and act simultaneously, such as a band of Pict Warriors or a crew of Pirates. Sometimes a tile represents a single central character from the scenario, like the terrible sorcerer Zogar Sag or the ruthless Captain Zaporavo.
Game Play
In Conan, two sides cross swords: the heroes who play together against the Overlord, sole master of their own units.
Both sides take turns playing, starting with the side specified by the scenario.
In Conan, heroes perform actions in any order, coordinating and alternating among themselves as they choose until all heroes decide to stop acting and end their turn (because they no longer have any gems available or because they wish to save some for future rounds).
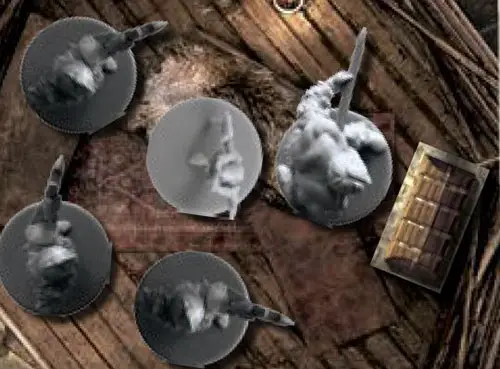
Then it is the Overlord's turn. On their turn, the Overlord may activate 0, 1, or 2 tiles in the River to move their units and attack the heroes.
Each tile represents a model or a group of models that the Overlord takes control of when activating this tile. Once the Overlord has completed their activations, the heroes take their turn.
The two sides thus alternate until one of them completes their objective to win the game as indicated by the scenario.
The Heroes' Turn
The heroes' turn consists of four phases that take place in the following order:
- Start Phase
- Stance Phase
- Action Phase
- End Phase
1. Start Phase
All energy gems spent by the heroes during the Overlord's turn are moved to their Fatigue zone.
2. Stance Phase
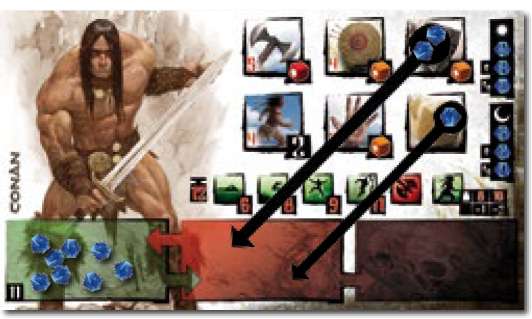
Each player chooses their hero's stance for the next action phase. A hero's stance will either be aggressive or cautious.

If the hero chooses an aggressive stance, they place their stance marker (a red gem) on the  .
.
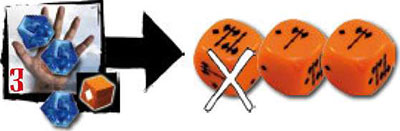
The hero then moves a number of gems from their Fatigue zone to their Reserve zone as indicated: if no heroes have died, the hero moves two gems.
If one hero has died, the hero moves three gems; if two or more heroes have died, the hero moves four gems.
An aggressive hero can perform any action during the action phase as long as they can assign gems.

If the hero chooses a cautious stance, they place their stance marker (a red gem) on the  . The hero then moves a number of gems from their Fatigue zone to their Reserve zone as indicated: if no heroes have died, the hero moves five gems.
If one hero has died, the hero moves six gems; if two or more heroes have died, the hero moves seven gems. A cautious hero can perform only Guard and Reroll actions. A cautious hero cannot
perform Melee Attack, Ranged Attack, Manipulation, and Move actions. They also cannot drop an object or cast a spell (unless it is a reaction spell).
3. Action Phase
Once all the heroes have chosen their stance, the aggressive heroes may perform the actions of their choice. During the Action phase, heroes do not act according to a defined turn order, instead they freely coordinate each of their actions.
Thus, a hero can perform any actions they want (such as attacking, moving, or attempting to open a chest), then hand the turn to one of their companion.
The next hero may then perform a certain number of actions before they also hand the turn over to another hero or to one that has already acted previously and so on. The phase ends when heroes cannot or choose not to perform any further actions.
(The heroes may want to keep some gems in their Reserve zone to help defend against the Overlord's attacks).
Here is a list of actions a hero may perform:
Melee Attack
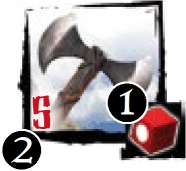
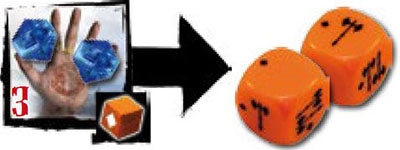
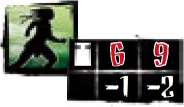
To perform a Melee Attack action, the hero chooses one enemy in their area (or sometimes in an adjacent area) to attack and assigns one or more gems from their Reserve zone to their Melee Attack space.
The hero may choose one of their weapon cards that has a Melee Attack bonus to attack with.
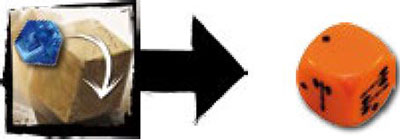
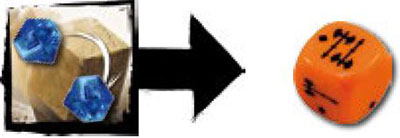
Then, for each gem assigned, the hero rolls one die of the type indicated on their Melee Attack space 1 plus the dice indicated on the chosen weapon card. After resolving any rerolls, the hero determines the attack power by adding up the number of symbols shown on the dice.
A hero can perform the Melee Attack action more than once during the action phase to attack the same or different characters.
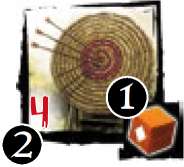
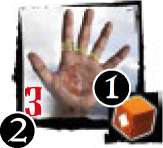
However, a player cannot assign gems to a space if doing so would raise the total number of gems on the space above its exertion limit, as indicated by the red number in the lower-left corner of the action space 2.

Hindering
The Melee Attack action is not affected by hindering.
Shevatas encounters a Guard on the ship's deck. Since the Guard has an armor value of 2 and 1 life point, Shevatas will need to cause at least 3 damage to defeat the Guard.
-
He chooses to assign two energy gems to his Melee Attack space, which will allow him to roll

-
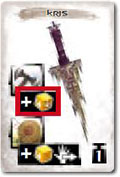
Also, because he is performing this Melee Attack with a Kris, he rolls
 as well. The arrow on the yellow die icon means that Shevatas can reroll any yellow die in his attack once for free.
 -
He rolls the dice:
-
The attack power is 4, so he decides not to reroll the
and keeps his roll as-is for this attack. Shevatas will later be able to perform another Melee Attack action during this action phase as long as he does not go over his exertion limit of 4.This means that he could attack twice by assigning 1 gem for each attack, or once by assigning 2 gems on a single strike.
Unarmed Attacks
When a hero performs a Melee Attack action without a weapon card, the attack is considered to be unarmed. In this case, their attack power is reduced by 2. Attack made by the Overlord's units are never considered to be unarmed.
Ranged Attack
To perform a Ranged Attack, the hero must first choose one of their weapon cards that has a Ranged Attack bonus to attack with.
Then they assign one or more gems from their Reserve zone to their Ranged Attack space, and choose one enemy in their line of sight to attack.
To determine line of sight, trace an imaginary line from the  in the attacker's area to the in the chosen enemy's area. If this line crosses an obstacle shown on the board (a wall, a door, a mast, etc)., the line is blocked and that area is not in the attacker's line of sight.
Otherwise, the attacker has line of sight to that area. A character has line of sight to its own area. Friendly or enemy models do not block line of sight but can hinder Ranged Attacks. The distance between two areas does not affect line of sight.
For each gem assigned, the hero rolls one die of the type indicated on their Ranged Attack space 1, plus the dice indicated on the chosen weapon card.
After resolving any rerolls, the hero determines the attack power by adding up the number of symbols shown on the dice. If the chosen weapon has  next to its Ranged Attack bonus, the attacker drops the weapon in the defender's area at the end of the attack.
A hero can perform the Ranged Attack action more than once during the action phase to attack the same or different characters.
However, a player cannot assign gems to a space if doing so would raise the total number of gems on the space above its exertion limit, as indicated by the red number in the lower-left corner of the action space 2.
Hindering
The Ranged Attack action is affected by hindering unless specified otherwise.
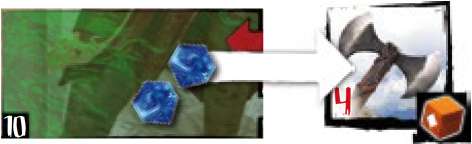
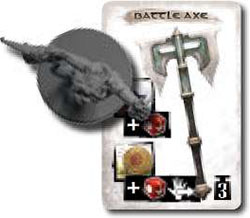
Conan has been tasked with infiltrating a Pict village to kill Zogar Sag, the evil Pict sorcerer. At this point, Conan's quarry is in an adjacent area, but the barbarian is pinned by the Giant Snake (who has the Blocking skill).
-
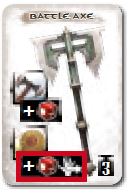
Since Conan is unable to move from his current area, he opts to hurl his Battle Axe at Zogar Sag's head. He assigns three energy gems to his Ranged Attack space, which allows him to roll
 .
.Also, because he is making this ranged attack with a Battle Axe, he rolls
 as well. He rolls the dice:
-
The attack power is 4, and the Battle Axe card is now lying in Zogar Sag's area.
Elevation and Line of Sight
As a general rule, in the case of an abrupt change in elevation, only the higher areas have line of sight on the lower areas.
When line of sight is in doubt, players should use their best judgment to determine if line of sight exists.
Elevation Bonus for Ranged Attacks
When a character attacks an enemy at a lower elevation using a Ranged Attack, the attacker rolls an extra .
Guard
When a hero is attacked, after the attack power is determined, the hero may defend against the attack. The hero chooses whether or not to perform a Guard action.
To perform a Guard action, the hero assigns one or more gems from their
Reserve zone to their Guard space. The hero may then choose one of their equipment cards that has a Guard bonus to defend with, such as a weapon or shield. If the hero chooses to defend with one of their equipment card, they are considered to be parrying. Otherwise, the hero is considered to be dodging.
A hero can choose only a shield when defending against a ranged or area attack.
For each gem assigned, the hero rolls one die of the type indicated on their Guard space 1, plus the dice indicated on the chosen equipment card.
The hero then determines the defense power by adding the number of symbols shown on the dice and their Armor if they have one. A Guard action is only effective against a single attack unless specified otherwise.
Hindering
The Guard action is not affected by hindering.
Shevatas confronts the Giant Snake, who lunges at him:

-
The Giant Snake's attack has a power of 5.
-
Having no shield or weapon to parry with, Shevatas performs the Guard action to attempt to dodge the attack. He assigns two energy gems to his Guard space, allowing him to roll
. He rolls the dice, obtaining two symbols. His defense power is 2.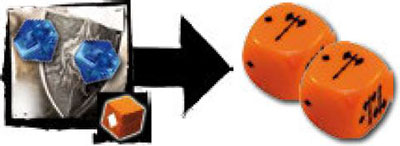
-
The thief suffers 3 damage from this attack and moves 3 gems to his Wound zone.

Armor
Asset cards like leather armors and other protections are what essentially grant Armor.
It's a "minimum default" defense that does not require any spending of energy and which a hero benefits from automatically for each attack they suffer when they have such an equipment.
Whether a hero uses a Guard action or not, they still benefit from the Armor of one of their equipment cards with the Armor bonus when calculating their defense power.
However, they must declare whether or not they Guard before using their Armor.
A Guard takes a swing at Conan with an attack power of 1:
He decides to assign an energy gem to his Guard space to roll an orange die  . He also rolls a thanks to his Leather Armor that protects him from every attack.
- He rolls the dice:
- He suffers 1 damage.
Manipulation
The Manipulation action encompasses a wide range of activities, from throwing an object to picking a lock. There are two types of Manipulation actions: simple and complex.
-
To perform a simple Manipulation, the hero assigns one gem from their Reserve zone to their Manipulation space (but rolls no dice). To pick up, give, take, or catch an object, a hero performs a simple Manipulation.
Objects include item and equipment cards, as well as anything specified by the scenario. Whenever a hero wants to give an object to another hero, one of the two performs a simple Manipulation, that object is immediately equipped by the hero who takes it.
-
To perform a complex Manipulation, the hero assigns one or more gems from their Reserve zone to their Manipulation space and may choose one of their equipment cards that has a Manipulation bonus.
For each gem assigned, the hero rolls one die of the type indicated on their Manipulation space
1, plus the dice indicated on the chosen card. The manipulation power is equal to the number of symbols shown on the dice.Complex Manipulations have a difficulty defined by the scenario. If the manipulation power is equal to or higher than the Manipulation's difficulty, the hero succeeds at the Manipulation. Otherwise, the hero fails the Manipulation.
A hero can perform the Manipulation action more than once during the action phase. However, a player cannot assign gems to a space if doing so would raise the total number of gems on the space above its exertion limit, as indicated by the red number in the lower-left corner of the action space 2.

Hindering
Simple Manipulations are not affected by hindering. Complex Manipulations are affected by hindering.
Throwing and Catching an Object
To throw an object, the hero chooses one of their objects that has an encumbrance value of 3 or less and an area in their line of sight.
The hero performs a complex Manipulation that has a difficulty equal to the distance from the hero to the chosen area. If the hero succeeds, the hero drops the object in the chosen area.
If the hero fails, the hero drops the object a number of areas away equal to the manipulation power, following the line of sight to the chosen area. When the object is dropped in an area, one hero in that area may immediately perform a simple manipulation to catch the object or pick it up.
Dropping an Object
A hero can drop one of their objects in their area as a free action (without assigning gems). If an object with an area effect is dropped, the effect is resolved as if the object had been thrown.
Opening a Chest
To open a chest, a hero must pick the chest's lock by performing a complex Manipulation while in the chest's area. The difficulty of the Manipulation is 2 unless the scenario specifies otherwise.
If the hero succeeds, the hero removes the chest from the board, takes the top card of the asset deck and places it faceup next to their hero sheet.
When a hero opens a chest, they can choose not to claim its content right away, in which case the top card of the asset deck is placed in the chest's area, and it can be picked up later by performing a simple Manipulation.
Reroll
A hero can perform Reroll actions after rolling dice but before finalizing the results of the roll.
To perform a Reroll, the hero assigns one or more gems from their Reserve zone to their Reroll space.
The hero then rerolls that many dice.
A hero can perform the Reroll action multiple times and may reroll the same dice or different dice each time.

Hindering
The Reroll action is not affected by hindering.
Conan is alone in a Pict hut with a chest. Since no one is hindering him, if he obtains at least two symbols, he can pick the lock and immediately claim its contents.
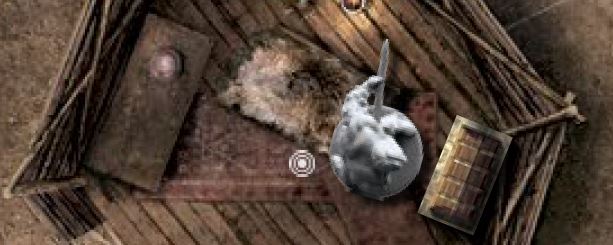
-
He decides to assign two energy gems to his Manipulation space and rolls the dice, but does not obtain enough symbols.
-
He chooses to reroll the blank die by assigning one gem to his Reroll space, obtaining yet another blank result.
-
He elects to reroll again, assigning one more gem to his Reroll space, and this time he finally obtains a favorable result.
-
His three symbols are more than enough to succeed, allowing him to open the chest and discover what treasures lie within.
Move
A hero must spend one movement point to move across a border from one area to an adjacent area. Hindering and some terrain effects can increase the number of movement points required to cross a border.
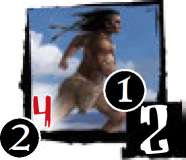
All characters have a base movement value 1. At the start of the Action phase, an aggressive hero gains a number of movement points equal to their base movement value.
These movement points are free; they do not require the hero to assign gems to the Move action. As a result, the first movement points a character spends are the movement points gained thanks to their base movement value.
Each turn, when a hero stops moving to perform an action other than a Move, the hero loses all of their remaining movement points. However, the hero can still perform a Move action to gain movement points that turn.
To perform the Move action, the hero assigns one or more gems from their Reserve zone to their Move space. For each assigned gem, the hero gains 1 movement point that must be spent immediately.
A player cannot assign gems to a space if doing so would raise the total number of gems on the space above its exertion limit 2.
At the end of the Action phase, all unspent movement points are lost.
Note: In Conan, a hero performs their actions in any order they want. They may start their action phase by attacking an enemy, and then move away using their base movement points since it is their first move action this turn.
Hindering
Movement is affected by hindering.
Conan is surrounded by three guards in an area of the village. He wants to enter an adjacent hut.

-
The action phase starts and Conan decides to rid himself of a few enemies first by using a Circular Strike with his axe, killing two of them.
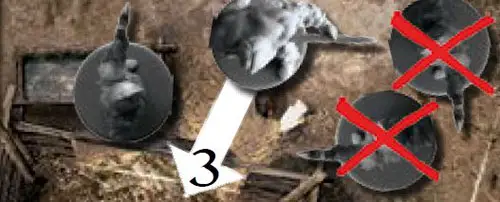
-
Then he moves. He must move from one area to another (cost: 1 movement point), step through the hut's entrance (extra movement cost: +1 movement point), and factor in the presence of the last guard in his starting area hindering his move (extra movement cost: +1 movement point).
It will cost him a total of 3 movement points. The first 2 points come from his base movement, and the last point requires that he assigns a gem to his Move space.
Casting a Spell
A hero's spell cards are placed face up near their hero sheet. Casting a spell is an action. To cast one of their spells, a hero assigns a number of gems equal to the spell's cost 1 from their Reserve zone to that card.
The number of gems placed on the card cannot exceed the spell's exertion limit 2- At the end of each turn, during the End phase, each player moves all gems from their spell cards to their Fatigue zone.
Some spells function as attacks, and specify what they attack and which dice to roll. The caster determines the attack power by adding up the number of symbols shown on the dice.
Characters defend against and suffer damage from spell attacks as they would against other attacks.
Hindering
Casting a spell is not affected by hindering.
Attacking with a Hero
The hero:
- chooses an enemy they want to attack,
- assigns a number of gems to their Melee or Ranged Attack space (it cannot be modified later),
- chooses a weapon to attack with (or perform an unarmed attack),
- rolls the dice,
- uses any free rerolls and/or perform any Reroll actions,
- applies any penalties from hindering and unarmed attack,
- determines the attack power. At this point, the attack power can no longer be modified.
Defending with a Hero
The hero:
- casts reaction spells or uses skills that can be used in reaction to the attack (Sacrifice, Mitra's Halo, etc).,
- chooses whether or not to perform a Guard action and assigns a number of gems to their Guard space (this cannot be modified later),
- chooses a weapon or shield to parry,
- adds any dice from Armor,
- rolls the dice,
- uses any free rerolls and/or perform any Reroll actions,
- determines the defense power. At this point, the defense power can no longer be modified.
- determine how much damage they suffer.
4. End Phase
Once all the heroes have finished performing actions, each hero moves all gems from their action spaces, allies' tiles, spell cards... to their Fatigue zone.
Play then proceeds with the Overlord's turn.
Hindering
When a character moves or performs an action in an area in which the number of enemy characters is equal to or higher than the total number of friendly characters, that character may be affected by hindering.
Hindering Movement
If the number of enemy characters in a character's area is equal to or higher than the number of friendly characters in that area, that character must spend extra movement points to move out of that area.
Important: The Overlord's characters movement are also affected by hindering.

Hindering Die Rolls
If the number of enemy characters in a character's area is equal to or higher than the number of other friendly characters in that area, when that character rolls dice, that roll is affected by hindering.

Conan is in the same area as three enemies and he attempts to pick the lock on a chest. Because of hindering, three symbols are ignored. So, if this lock would have required two symbols to be successful, Conan would need five symbols in order to successfully pick the lock.

Conan and Belit are in the same area as three enemies and one of the heroes attempts to pick the lock on the chest, two symbols are ignored (the other hero is keeping the enemy characters "busy").
Skills and Encumbrance
Each hero has several skills. Skills are represented by icons on the hero's sheet, and their effects are explained on the skill game aids and detailed at the end of this rulebook.

The icon to the left of a hero's skills indicates the hero's maximum encumbrance value.
If a hero's encumbrance level ever exceeds the hero's maximum encumbrance value, the hero must immediately drop one or more objects to reduce their encumbrance level to equal to or less than their maximum encumbrance value.
The red number in the lower-right corner of each skill icon indicates the skill's encumbrance limit. The total of the encumbrance values of all of a hero's objects is the hero's encumbrance level.
If the hero's encumbrance level is equal to or higher than a skill's encumbrance limit, the skill cannot be used.
Encumbrance can also affect a hero's movement. The icon to the right of a hero's skills represents the hero's movement and has two encumbrance limits.
During the Action phase, if the hero's encumbrance value is equal to or higher than either encumbrance limit, the hero receives fewer movement points from their movement value based on the highest exceeded limit (as indicated under the limit).
One-handed and Two-handed Weapons
A weapon that has an encumbrance value of 2 or less is considered a one-handed weapon.
A weapon that has an encumbrance value of 3 or more is considered a two-handed weapon. A character with such a weapon cannot use another weapon for a single attack.
Falling Damage
When a hero falls, that hero rolls dice as instructed by the scenario. The hero cannot defend against falling (the Guard action and Armor do not prevent damage from falling), but can perform Reroll actions to reroll the dice and try to mitigate falling damage.
Falling does not cause a hero to lose any remaining base movement points.
If a falling character is carrying another character, both suffer the same damage but the player controlling the carrying character is the only one who can perform Reroll actions.
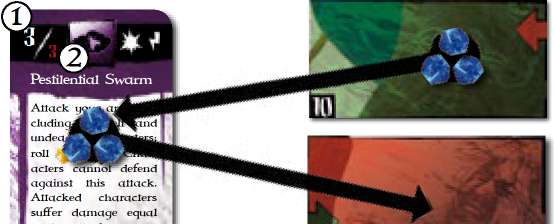
Area Attacks
 indicates that an effect is an area attack. When a character attacks an area, they attack each character in the specified area. The dice for an area attack are rolled once and apply to each attack. The attacker resolves the attacks in the order of their choice.
Guard bonuses from weapon cards cannot be used to defend against area attacks, but dodging, Armor, and Guard bonuses from shields work as usual. Assets with the area attack icon (such as the Explosive Orb) are discarded after use.
Occupied Areas
A character cannot end its movement or move across an area if the model's base could not fit entirely in that area.
That area is an occupied area. Occupied areas are considered to be within melee range of all adjacent areas. However, it is not possible to perform a melee attack from an occupied area to an adjacent area.
Rerolls
Some die icons show an arrow on them. Once after a player rolls a die indicated by one of these icons, the player may reroll one die of the matching type for free (without performing a Reroll action).
Certain skills (such as Support) allow players to reroll a die for free even if that die has already been rerolled.
Activating Allies
A hero with the Leadership skill can give orders to any ally on the battlefield unless specified otherwise in the scenario. When instructed by the scenario, place the corresponding ally tile next to the sheet of the hero with the Leadership skill.
During the Action phase, if they are in an aggressive stance, the hero may activate the ally's models by assigning gems from their Reserve zone to the ally tile:
Assigning one gem activates an ally model. Each ally model can only be activated once per Action phase. When an ally attacks, they lose their remaining points from their base movement value.
The hero can assign additional gems to gain additional movement points (1 gem = 1 movement point for 1 ally model) after they spent their base movement or after they attacked. A hero cannot gain more movement points than the ally's base movement value.
The aggressive or cautious hero can also perform a Guard action with an ally by assigning gems. For each gem assigned, the hero rolls  .
.
The aggressive or cautious hero may reroll an ally's dice by assigning one gem per rerolled die.
Unless specified otherwise, an ally has only 1 life point. At the end of the action phase, the gems placed on the ally tiles are moved to the hero's Fatigue zone. If all the heroes with the Leadership skill die, the allies are immediately removed from the game.
Overlord's Book
You now know all the rules to play as heroes. To play a game of Conan, you will also need to read the Overlord's Book; it contains all the rules needed to play as the Overlord and all the information regarding how to set up scenarios.
You will notice that most of the Overlord's rules are similar to the heroes' (attacks, movement, hindering, etc)..
Continue Reading


