
Components
The box contains the following pieces:
- 1 game board and 1 turn token
- 8 board tiles
- 9 Cauldron markers (3 each against Goblins, Orcs and Trolls)
- 9 Traps tokens (3 Goblin, 3 Troll, 3 Siege Tower),
- Defender Machines tokens (3 Cannon, 3 Pole, 3 Bay Window),
- 1 Marksmen Blessing, 1 Unearthly Glare, 3 Ladders
- 1 Malfunction and 3 Spies tokens
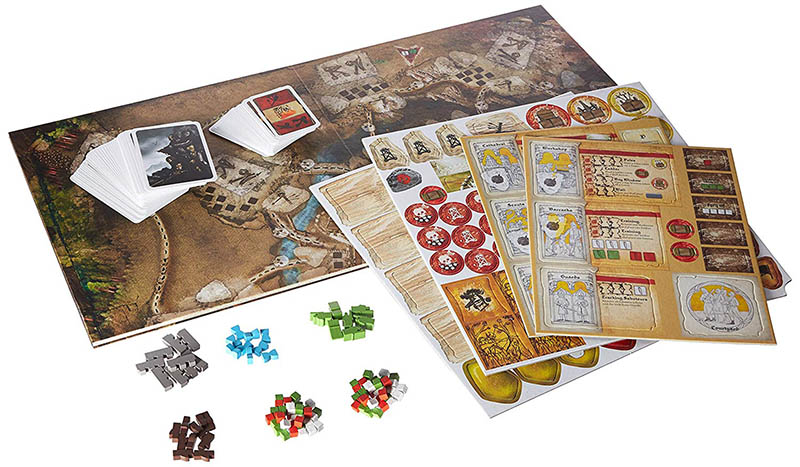
Invader's components:
- 200 Invader units (60 Goblins, 100 Orcs, 40 Trolls)
- 20 Wood counters
- 23 Action cards
- 36 Invader Machine cards (10 Hit, 26 Miss)
- 10 Invader Objective cards
- 3 ballista, 3 catapult, 2 trebuchet tiles
- 3 mantelet, 3 siege tower tiles
- 3 banner, 3 bridge, 3 ladders, 3 poison, 3 sap tiles
- 3 quartermaster, 3 saboteur, 3 trench master tiles
- 3 blood stones, 3 demon, 3 gale, 3 possesion, 3 specters tiles
- 5 Invader orders tiles
Defender's components:
- 20 Hourglasses
- 41 Defender units (17 Marksmen, 20 Soldiers, 4 Veterans)
- 23 Wall section components
- 6 Defender Hit cards
- 10 Defense Plan cards
- 2 Heroes tokens and 3 Heroic Order tiles
Game Play
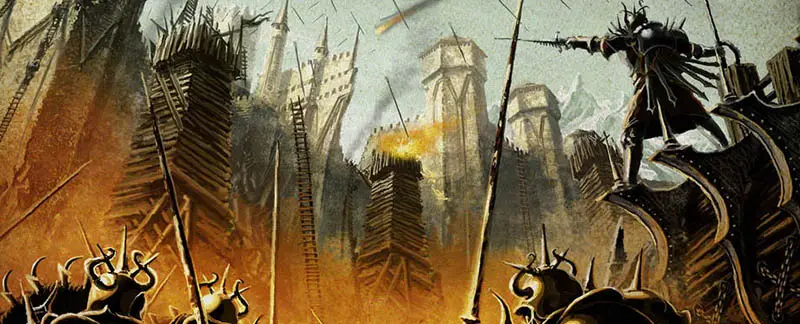
Stronghold is divided into 7 Turns. Each Turn consists of a series of actions by both players and at the end of the turn, there is an Assault. If the Invader manages to break the defenses on at least one Wall section, the Invader has breached the Stronghold, the game ends immediately, the Invader wins. If by the end of the 7th Turn the Stronghold remains unconquered, the Defender wins.
Players take actions alternately in each Turn: after every Invader Action, the Defender has a chance to take Actions.
Each Invader Action represents a stage of preparation for the Assault. The Invader uses resources gained to perform each Action provided by a set of Action cards. During the last Phase the Invader Units Maneuver from their camps and ramparts to Assault the Stronghold's Walls.
Each Invader Action takes a certain amount of time. The passage of time in the game is represented by Hourglasses. After each Action the Invader gives the Defender a specific number of Hourglasses. The Defender spends these Hourglasses on various Buildings and movements inside the Stronghold. After each Invader Action, the Defender must spend all the Hourglasses received.
After the last Invader Phase, the Defender spends all his Hourglasses and the Assault commences. Ranged Combat takes place first followed by Melee Combat - both sides trying to outsmart or overwhelm each other.
The Board
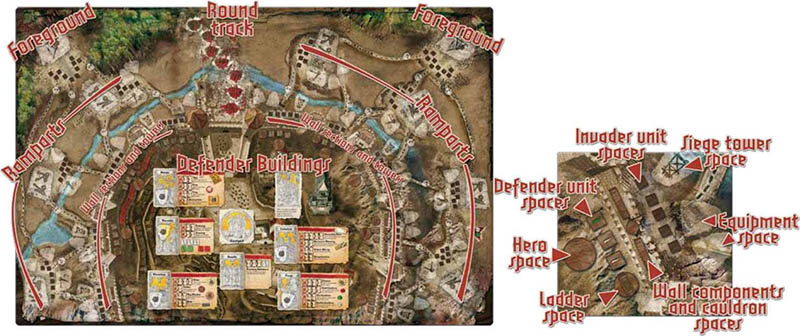
Spaces On The Board
There are spaces on the board where counters, cards, tiles, tokens and Units are placed. Only one piece may be placed on each space - unless specified otherwise.
Foregrounds And Ramparts
The Foregrounds and Ramparts are intermediate staging areas for the Invader Units moving to the Walls. Before the Invader Units reach the Walls, they need to be mustered on the Foreground, then move to the Ramparts and finally move to the Walls.
The Ramparts are where the Invader Machines and Fortifications are built and Training counters are placed. Each Foreground may hold a maximum of 10 Invader Units.
Each Rampart may hold a maximum of 7 Invader Units. Units may not enter a Rampart or Foreground which is full. While moving Units from the Rampart and Foreground, be sure that you have made enough space for upcoming Units.

Paths
The Foregrounds, Ramparts and Wall sections are connected by Paths, which are used by the Invader Units to advance. Note that the Invader Units cannot move backwards - they may only advance towards the Walls. The Defending Scouts can place Traps on these Paths, while the Invader may set up Bridges to prevent this.

Trap Spaces
This is where the Defender may place Traps for Goblins, Trolls or Siege Towers and the Invader may set up Bridges.
Wall Sections
The Stronghold Walls are divided into sections. On these sections, the fight between Invader and Defender Units takes place.
The Towers
The Defender may use each Tower to hold one Cannon, Pole or Bay Window.
Each Tower may only hold one Machine Counter. Additionally, each tower may also hold 2 Marksmen. Marksmen may be added to or withdrawn from any Tower by the Defender.
Buildings Inside The Stronghold
The Stronghold contains several Building tiles: the Forge, the Workshop, the Scouts' Quarters, the Cathedral, the Hospital, the Courtyard, the Barracks and the Guard House.
Setup
The players decide who will play as the Defender and the Invader. Place the board on the table with the Defender sitting behind the Stronghold.
Invader Preparations
1 Place all of your Units in the pouch.
2 Locate both the Phase 1 and Phase 6 cards from the Action deck and place them face up on the table. The Invader shuffles each set of Phase 2, 3, 4 and 5 cards separately, and randomly draws three cards from each set. These cards outline the strategies available to the Invader during the game.
All three cards from Phase 2 and 3 enter the game immediately and should be placed side by side with the Phase 1 and 6 cards. Action cards must always form a line in ascending numerical order with the Phase 1 cards at the far left and the Phase 6 cards at the far right. When the Invader has multiple Action cards with the same Phase number, he may choose the order those cards from left to right.
Note: Place the drawn Phase 4 and 5 cards aside in an Action Supply pile. Return all unused cards to the box.
3 Place 1 white, 3 green and 1 red Units on each Foreground space.
4 Place 1 white and 1 green Unit on the Marauders space.
5 Shuffle the Objective cards, draw 3, keep 2 of them, and place them face up. Return the remaining cards to the box.
6 Consult the action cards being used for this game and gather all tokens needed.
7 Take 5 Wood tokens into your supply and place the remaining ones aside to form a Wood supply.
8 Place the Machine Hit and Miss cards near the board.
Note: Random selection of Phase cards enhances the diversity of the game and requires some Stronghold gaming experience from the Invader. For your first few games it is recommended that you use the preset cards. The preset cards are marked with a red line as shown:

Defender Preparations
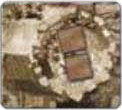
9 Place the appropriate Units on each Wall section. Each space with a colored mark receives one Unit of the corresponding type. Additionally, place 2 Stone Wall components on each Wall section.
10 Place the Building tiles in the Stronghold in any arrangement you find comfortable. Be sure not to cover important spaces on the Wall sections!
11 Place 1 Marksman in the Guard House.
12 Place three Marksmen, one Soldier and one Veteran in the Barracks. The remaining Units are placed next to the board.
13 Place the Heroes on the appropriate Wall sections. Place the Heroic Order tiles next to the board.
14 Shuffle the Defense Plan cards, draw 3, and choose 2 to keep. Place the chosen cards face down next to the board. Return the unused cards to the box.
15 Place the Defender Hit cards in a pile near the board.
16 The Defender receives 4 Hourglasses to use after the first Invader Action of the 1st Turn.
17 Place the remaining Hourglass tokens next to the board to form a supply.
18 Place the remaining markers and tokens near the board.
19 Place the turn token on the first space of the turn track.

You Are All Set Up And Ready To Play!
Note: At the start of every round, the Defender receives 2 Hourglasses to spend after the Invader's first action. This means that the Defender begins with 6 Hourglasses in the first Round plus any additional gained from Invader actions.
The Invader
Read here all detailed information about the Invader.
The Defender
Read here all detailed information about the Defender.
The Assault
The Phase 6 ends when the Defender spends all his Hourglasses, and then the Assault commences. The Assault consists of the following successive stages:
Ranged Combat
Stage 1 - Cannons, Stage 2 - Siege Machines, Stage 3 - Marksmen.
Melee Combat
Stage 1 - Cauldrons, Stage 2 - Poles, Stage 3 - Orders, Stage 4 - Resolving Strength, Stage 5 - The Hospital.
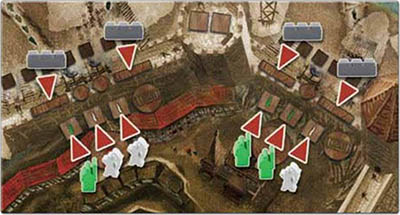
Ranged Combat
Defender Cannon Barrage
The Defender selects which Foreground or Rampart each Cannon will fire upon. Turn over one Hit card per Cannon. Consult the Cannon portion of the card. Remove one Unit of the type indicated on the card. After all Cannons have fired, reshuffle the hit cards and place them next to the board.
Siege Machine Barrage
The Invader selects a Wall section each Siege Machine will fire upon. Reveal the top card of each Siege Machine deck and resolve all Hits. Discard all Miss cards and return all Hit cards to their deck face-down. Reshuffle all Machine Card decks.
Marksmen Volley
Marksmen on the walls who are not currently engaged in Melee Combat and Marksmen in the Towers may fire at the Invader Units.
Marksmen on Walls may Fire at the Ramparts connected to their Wall section by Paths.
Marksmen in a Tower may Fire at any Ramparts opposite the Tower.
Every participating Marksman firing adds +1 to the Volley Strength at that Rampart. The total Strength of the Volley hitting the given Rampart determines the total Strength of the Invader Units killed. The Defender chooses which Units to kill (e.g. if 2 Strength points must be removed, the Defender can remove 1 Orc or 2 Goblins).
Note: The Defender Volley Strength has to be equal to or higher than the Strength of the targeted Invader Units. If there are Invader Units on a given Wall section, the Marksmen on that section are engaged in Melee Combat and cannot shoot. Marksmen in the Towers are never in Melee Combat.
Melee Combat
Cauldrons
The defenders pour the lethal contents of the Cauldrons onto the Invader Units.
The Invader removes Units killed by each Cauldron.
Poles
Each Pole may be used to attack one Wall section which is adjacent to the Tower equipped with a Pole. The Defender declares which Wall section is attacked by each Pole and turns over the top card of the Hit deck for each Pole. Consult the Pole section of the card. If a hit is shown, discard the Invader Unit attacking that Wall section with the lowest Strength. Reshuffle the Hit deck after resolving all Pole attacks.
Orders
The Invader reveals all Order tokens (if they were face down) and resolves the effect of each Order.
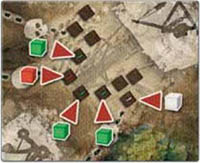
Resolving Strength
The Strength of the remaining fighting forces is compared on each of the Wall sections. Both players sum the total Strength of their respective Units on each Wall section.

Strength Advantage
Melee Combat at each Wall section is won by the player with the highest total Strength.
Subtract the losing player's Strength from the winning player's total. The result is called the Advantage.
The player who lost the Combat must lose Units (counted in Strength points) equal to the Advantage. Those Units are killed and removed from the game (in case of the Invader) or placed in the Hospital (in case of the Defender).
Breaking Into The Stronghold
If the Invader Advantage is higher than the Strength of the Defending Units at any Wall Section, the Invader breaks into the Stronghold and captures it, winning the game.
End Of The Turn
Before the next Turn begins:
- Remove all Tokens which expire with the end of the Turn.
- The Invader removes all Units and Wood from the Action cards.
- The Units are removed from the game while the Wood returns to the Wood supply.
- The Defender removes all Hourglasses from the completed Actions.
Note: Hourglasses marking incomplete Actions remain on the board.
Move Round token by one space. Now the Defender receives 2 Hourglasses to use after the first Invader Action. The Invader begins a new Turn with Phase 1 - Supplies.
Continue Reading
