Players will attempt to emulate the feats of Francis Drake by mounting 3 voyages to the Spanish Main. Before leaving England's Plymouth Harbor, they will have to find the necessary crew, guns, ships and supplies.
These may be picked up in the streets of Plymouth or obtained via wealthy investors, Queen Elizabeth or Drake himself. Once ready to sail, each captain must chart his course on the Spanish Main and decide which forts, towns and galleons to plunder.
Documents taken from the Spanish Admiral and Governor will make their tasks easier, as will informers who give information on the plans of rival captains. With their boats full of loot and plunder they will then sail back to Plymouth Harbor and be rewarded by Queen and country depending on how much havoc they wreaked on Spain's New World Empire.
Components
- 1 Game Board
- 1 Voyage Marker
- 5 Frigates and 5 Galleons
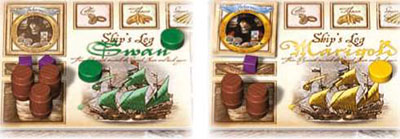
- 5 Ship Logs
- 5 Treasure Chests
- 30 Mission Discs: 6 in each player color
- 50 Player Discs: 10 in each player color
- 20 Player Cubes: 4 in each player color
- 5 Player Scoring Markers
- 5 Investor Tiles
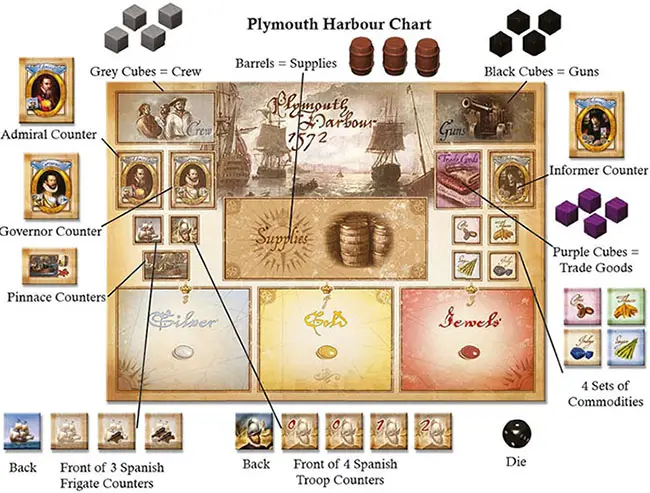
- 1 Plymouth Harbor Chart
- 3 Sets of 16 Location Tiles: 3, 4 and 5 Player sets
- 4 Spanish Troop Counters (plus 1 spare set)
- 3 Spanish Frigate Counters (plus 1 spare set)
- 3 Spanish Galleon Counters
- 1 Governor Counter
- 1 Admiral Counter
- 1 Informer Counter
- 2 Pinnace Counters
- 1 Sheet of Stickers (with 1 spare set)
- 4 Sets of Commodities: 3 Indigo, 6 Sugar, 6 Coffee,
- 6 Tobacco Cubes: 28 Crew (grey), 28 Guns (black),
- 8 Trade Goods (purple)
- 21 Supplies (barrels)
- Treasure (glass stones): 12 Gold , 12 Silver and 9 Jewels
- 1 Die
The Game Board
The Score Track runs around the outside of the board which is divided into 3 areas:
1. Plymouth is represented by a "one-way street" of locations and personalities (referred to as Locations). Here, players can acquire the items and assistance nec- essary for their voyages. 16 of the 18 Locations are on separate Tiles, with Investor and Dockside only printed on the board.
There are 3 sets of these 16 Tiles, each color coded: One set for each of the 3, 4 and 5 player games. Each set varies only in the number of items available.
The set printed on the game board is for the 4 player game. On the 2nd and 3rd voyages the set of 16 Location Tiles appropriate for the number of players is shuffled and laid out over the first 16 Locations printed on the board, to give a different order for the Locations in Plymouth.
2. Plymouth Harbor has 5 docks for the players' outbound ships and 5 docks for their home- bound ships.

3. A map of the Caribbean which shows Towns, Forts, 3 Spanish Galleons with their Frigates and 3 Trade Ports with the Commodities that are available there. Each of the above places will be referred to as a Destination.
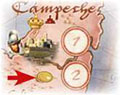
- Next to each Destination are 2 or 3 numbered circles. These are the places that players may sail their ships to on each voyage.
- The map is divided into 4 zones, indicated by the numbered Navigation Markers. The color of the circles matches the color of the zone it is in.
- Some Destinations show a number of Spanish Troops and/or Guns that defend that Destination.
- The yellow Crown and number on most Destinations indicates the number of Victory Points (VP) received for a successful attack there.
- At the bottom left is the "Types of Conquests Chart" showing the VP for attacking different types of Desti- nations: Towns, Forts and Galleons.
- At the top left is the Commodities Chart which shows the VP scored for Commodities held at the end of the game.
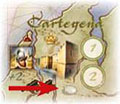
- Below the Commodities Chart is the Voyage Chart.
- The gold, silver or jewel icon next to most Destinations indicates what type of treasure is placed there each turn.
Setup
Place the Plymouth Harbor Chart next to the board and place the following on their respective icons: Gold, Silver, Jewels, 3 Spanish Frigates, 4 Troops, the Admiral, the Governor, the Informer, 2 Pinnaces, Cubes (grey, black, purple), Barrels and the Commodities (Sugar, Tobacco, Coffee, Indigo).
Place 1 of each available Commodity on its corresponding icon on the map at the Trade Ports: San Juan, Santo Domingo and Santiago de Cuba.
Shuffle the 3 Spanish Galleon Counters and place 1 face-up, on each of the 3 galleon icons on the board.
Each player takes in his color: 1 Frigate, 1 Galleon, 6 Mission Discs, 10 Player Discs, 4 Player Cubes, 1 Scoring Marker, 1 Ship Log. He also takes 1 Treasure Chest and 1 Investor Tile.
Place the players' Frigates and Galleons off-board near Plymouth Harbor.
Each player places 1 of his Player Cubes at the top of each of the 3 sections of the Types of Conquests Chart and 1 on his Ship log (on the ship itself).
Place the Players' Scoring Markers on 4, on the Score Track.
Place the Voyage Marker on 1 on the Voyage Chart.
Choose a set of Location Tiles applicable to the number of players in the game. On voyage 1 in a 4 player game place them beside the board for use in voyages 2 and 3. In a 3 and 5 player game place each Tile over its counterpart Tile from the 4 player game printed on the board.
Where pairs occur (Crew, Guns, Supplies), place the better Tile earlier on the street; the one with the larger number of items on it.
Game Play
The game consists of 3 voyages to the Spanish Main. Each voyage has 2 phases.
- Provisioning Phase:
- Sailing Phase:
After the 3rd voyage, VP for Commodities and hid- den booty from the Treasure Chests are added to each player's score. The winner is the player with the highest VP total.
1. Provisioning Phase
A. Starting Order
Place the players' Frigates in a cup and randomly draw out one at a time. Place the Frigates in the order drawn in Homebound Docks 1, then 2, then 3 etc. This determines the order in which the players will place their Discs and select items as they move along "Plymouth Street".
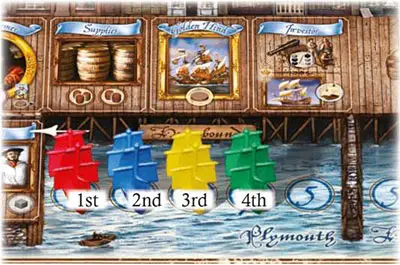
Example 1: The Frigates are drawn out in the order Red, Blue, Yellow and Green. They are placed in this order in Docks 1-4. This is the order in which players will place their Discs.
The last player is given 1 Gun (black cube). This compensation only occurs on voyage 1 and not on voyages 2 and 3.
B. Placement And Selection
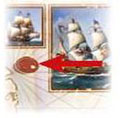
Plymouth street contains 18 Locations and starts with the first Location (Crew) to the left of the Homebound Docks and proceeds clockwise finishing at Dockside just above the Outbound Docks.
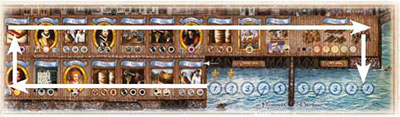
Example 2: Shows the direction of "Plymouth Street".
In player order each player places 1 of his Player Discs on a circle on a Location in Plymouth Street. For each player, placement may start on the Crew Location or on any subsequent Location further along Plymouth Street (he may jump ahead). The only requirement is an empty circle to place on (Except Investor where all may stop).
Players continue to place Discs in player order, but each player's next placement must be further along the street than HIS previous placement. He may not go back to a Location he has already passed over. It is a one-way street.
Each player may only place 1 Disc on each Location (except for Drake - see below).
After placing a Disc, the player takes the items granted at that Location from the Plymouth Harbor Chart and places them on or next to his Ship Log.
Each player decides when he has enough items for his voyage and instead of placing his next Disc, he moves his ship from the Homebound Docks to the first avail- able space in the Outbound Docks; he is ready to sail.
If a player places a Disc at Dockside his next move must be to move his ship into the Outbound Harbor.
Players continue to place Discs and take items until all have ended up placing their Ship in the Outbound Harbor. Players reaching the Harbor then skip their turns until all players' ships are in the Harbor.
The order of the ships in the Outbound Docks be- comes the order in which the ships sail in the Sailing Phase and is termed the Sailing Order.
The Locations:
- Each Location has an image depicting what is available.
- Each has a number of circles which indicate how many players may place a Disc there (Except for Drake and Investor - See below).
- The icons inside the circles indicate what is received when a Disc is placed there.
To understand what items are available in Plymouth Street, each of the Locations is described below.
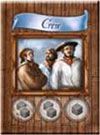
Crew
Up to 3 players may stop here and place a Disc on an empty circle and take the number of Crew (grey cubes) indicated inside the circle.
Crew are needed to attack Towns and Forts.

Guns
Up to 3 players may stop here and place a Disc on an empty circle and take the indicated number of Guns (black cubes). Guns are needed to attack Forts and Spanish Galleons.
Supplies

Up to 3 players may stop here and place a Disc on an empty circle and take the indicated number of Supplies (barrels). Supplies determine which zones (how far) a player can sail to on the map. It costs 1 barrel per zone.
With 3 barrels it is possible to sail to any Destinations in Zones 1, 2, or 3 in any order, the route taken is irrelevant. To reach zone 4 requires 4 barrels. Without at least 1 barrel to reach Zone 1, a player can't sail! Dockside is a player's last chance to get Supplies.
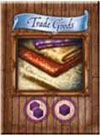
Trade Goods
Up to 2 players may stop here and place a Disc on an empty circle and take the indicated number of Trade Goods (purple cubes).
These goods may be traded 1 for 1 at the Spanish Trade Ports for the Commodities available there - Sugar, Coffee, Tobacco and Indigo.
Tavern
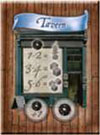
Up to 2 players may visit the Tavern. Each rolls 1 die. The 1st player adds 1 to his die roll. The 2nd player's roll is not modified. The chart shows for each die roll how many Crew (grey cubes) are obtained.
On a roll of 1 or 2, zero Crew are received, but the player receives the "Ghost Ship" Mission Disc for use on that voyage only.
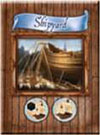
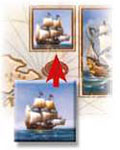
Shipyard
Up to 2 players may visit the Shipyard. The 1st player takes a Galleon and 1 Gun (black cube) and the 2nd player takes a Galleon.
Replace the player's Frigate with his Galleon. Without a Galleon a player is unable to attack a Spanish Galleon. A Frigate may stop at all other Destinations.
Pinnace
Up to 2 players may stop here. The first takes 1 Pinnace and 1 Crew. The second takes 1 Pinnace.
Having a Pinnace allows a player to sail his men ashore and attack any Forts on that voyage from the rear, ignoring any guns the Forts have. Thus a Fort can be attacked successfully for just the cost in Crew.

Drake
The 2 circles on Drake intersect which means that only 1 player may stop here, but he must spend 2 consecutive turns placing Discs on the Drake Location.
After the second placement the player takes 2 Crew and 2 Guns plus an additional 1 Crew or 1 Gun.
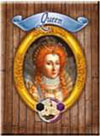
Queen
Only 1 player may stop here.
He upgrades his Frigate to a Galleon with 1 Gun and takes 1 Trade Goods (purple cube).
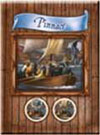
Admiral

Only 1 player may stop here.
He takes the Admiral Counter and the 3 Spanish Frigate Counters. The latter will be placed face-down on the frigate icons next to the 3 Spanish Galleons at the start of the Sailing Phase.
Only this player will know the exact number of guns required to attack that Galleon - the Galleon's gun power plus the additional guns on the Frigate (either 0, 1 or 2).He collects 1 VP for each Gold left on the board at the end of this voyage. The Gold then goes back to the supply, not into the player's Treasure Chest.
Governor

Only 1 player may stop here.
He takes the Governor Counter and the 4 Spanish Troop Counters. At the start of the Sailing Phase he will place 1 Troop Counter face-down on the troop icon of each Fort. Only this player will know the exact number of Crew required to attack that Fort - the Fort's troop strength plus the additional troops on the Counter (either 0, 0, 1 or 2).
Unless he is already in Dock 1, he swaps places with the player one Dock to the right in the Outbound Harbor just before sailing.
He collects 1 VP for each Silver left on the board at the end of this voyage. The Silver then goes back to the supply.
Informer
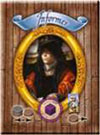
Only 1 player may stop here. That player takes 1 Trade Goods (purple cube) and the Informer Counter which is used at the start of the Sailing Phase, after all players have placed their Mission Discs.
The Informer allows the player to either:
Examine any Mission Discs at a single Destination where he is present. He may then swap the position of any 2 of his Mission Discs to help him gain an advantage when attacking or trading. OR
He may examine the defense of a Fort or Spanish Galleon where he has a Disc and if desired, may move this Disc to another Destination in a zone he has Supplies to sail to.

Golden Hind
Only 1 player may stop here. He takes his Golden Hind Mission Disc and puts it with his other Mission Discs for use on this voyage.
In the Resolve Missions Phase the player with the Golden Hind always goes first with this Disc before all other Mission Discs from all players.
Investor

All players may stop here once during the game, but then must give up their Investor Counter which is returned to the box. Investors want a return on their investment, so it costs a player 4 VP to stop here. The player chooses if he stops
on the upper half of the card, which gives 1 crew and 2 guns or 2 crew and 1 gun OR the lower half which allows the player to exchange his Frigate for a Galleon for this voyage only. Any number of players may stop here on the same turn.
Dockside

All players may stop here and take 1 Crew, OR 1 Gun, OR 1 Supplies. Players place their disc on their matching colored circle on the Location.
2. Sailing Phase
A. Prepare For Sailing
Take 4 silver and place one on each of the 2 Towns and 2 Forts marked with silver icons.
Take 4 gold and place one on each of the 2 Towns and 2 Forts marked with gold icons.
Take 3 Jewels and place one on each jewel icon near the 3 Spanish Galleons.
The holder of the Admiral Counter places one of the Spanish Frigate Counters face-down on the frigate icon next to each Galleon.
Do this randomly if nobody has the Admiral Counter.
The holder of the Governor Counter places one of the Spanish Troop Counters face-down on the troop icon of each of the 4 Forts.
Do this randomly if nobody has the Governor Counter.
Unless already in Dock 1, the holder of the Governor Counter swaps the position of his ship with the ship one place to the right, in the Outbound Docks, so he improves his position by 1 place in the Sailing Order.

Example 3: Yellow has chosen the Governor, so he moves up into the 3rd Dock and pushes the Blue player back into Dock number 4. The sailing order is now Green, Red, Yellow, Blue.
Each player counts his Supplies (barrels) and places his remaining Player Cube on the Navigation Marker matching this number (to a maximum of 4). This determines which zones each player may sail to, in the Sailing Phase. No player may sail past his cube into the next higher numbered zone.
Example 4: Green has 3 Supplies and puts his cube on Navigation Marker 3. Yellow has 2 Supplies and puts his cube on Marker 2.
B. Sail
Each player has a set of numbered Mission Discs which will be used to show the various Destinations that he will sail to on this voyage and in what order: Mission 1 first, then Mission 2 etc.
The docks in the Outbound Harbor area show the sailing order for the players. In this order, each player places one of his Mission Discs face-down, on the 1st circle at one of the Destinations on the map.
The Mission Discs may be placed out in any number order.
Each player may only place one Mission Disc at each Destination, but all players could place a Disc at the same Destination (forming a stack on circle number 1).
A Player's Discs can be placed in any zones that he can sail to, which are up to and including the zone with the Navigation Marker holding his cube.
Play continues in sailing order until each player has placed all his Discs (even if he has no intention of using them all).
Only 2 successful attacks are allowed at each Destination, so the order in which the players arrive is important. If the first 2 attacks are successful, then a third or subsequent Mission Disc will miss out.
The numbers on the Mission Discs become important. The Golden Hind Disc is resolved first, then Mission 1 Discs, then Mission 2 Discs, then Mission 3 Discs etc.
With Discs having the same number the tie is resolved in the order that the players set sail - the Sailing Order.
C. The Informer
After all Mission Discs have been placed, the player having the Informer this turn may either:
1. Look at the Mission Discs at one Destination where he is present and then using this information to his advantage, he may exchange the positions of 2 of his Mission Discs. The exchanged Discs can be any 2 of his Discs, not necessarily the one that he just looked at... OR
2. Look at the defending Troop or Frigate Counter at one of his Destinations. Then if desired, he may move the Mission Disc at this Destination to any other Destination where he is not already present and has Supplies to reach.
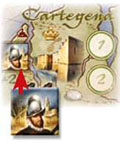
Example 6A: Yellow, who has the Informer, chooses to look at Cartagena. He picks up the red, blue and yellow discs there to find a red 1, a blue 1 and his 2. Attacks are resolved in Mission Disc order 1 to 4.
His Disc 2 would be 3rd to attack, after Red's 1 and Blue's 1 so he needs his Mission Disc 1 here. Ties are resolved using sailing order and using the order from Example 3, Yellow sails before Blue, so Yellow's 1 attacks before Blue's 1.
D. Turn Mission Discs Over
All the Mission Discs are now turned over to their face-up side. The numbers on each player's Discs indicates the order in which he will perform his attacks or trades: the number 1 Disc first, then the number 2 Disc etc.
At each Destination the lowest numbered Disc is put in the 1st circle and the next lowest in the 2nd circle. Where there is a tie, it is broken by the Sailing Order of the Ships in the Outbound Docks. If a Golden Hind Disc is present it always goes first.
Only 2 attacks are allowed per Destination, but a 3rd, 4th or 5th Mission Disc may be present in case an earlier attack fails to occur. They are left in a stack next to the 2nd circle.

Example 8: All Discs are turned over and placed in their arrival order: Mission 1 Discs before Mission 2 Discs etc. Ties are decided by Sailing Order which from Example 3 was Green, Red, Yellow, Blue.
Note, Blue's 1 stays at Cartagena in case Red's 1 or Yellow's 1 is unable to attack. Regardless of the Sailing Order, any player who has the Golden Hind Disc will conduct the first mission, before any of the players' number 1 Discs.
The Ghost Ship

When a player rolls 1 or 2 at the Tavern he receives no Crew but is given the use of his 'Ghost Ship' Mission Disc for that voyage. When all the Mission Discs are turned over this ship vanishes and is removed from the board. By having an extra Disc to place the player can play last and see what Destinations the other players have chosen.
E. Resolve Missions
Each player places his Ghost Ship Mission Disc face- down under his ship in the Outbound Harbor. These Discs record the Sailing Order once the players' ships sail off.

All attacks and trades are resolved one player at a time in Sailing Order sequence. Using the order from Example 3 above, the order of resolution is: The player with the Golden Hind goes first, then Green's Disc 1, then Red's Disc 1, then Yellow's Disc 1, then Blue's Disc 1, then Green's Disc 2, then Red's Disc 2 etc.
A player having the Golden Hind sails his ship from the Outbound Harbor to the Destination marked with his Golden Hind Mission Disc (place the ship on the Disc) and performs his mission.
Then all players simultaneously sail their ships and place them on their respective Mission 1 Discs. Each Mission 1 Disc is resolved in Sailing order, then all players move their ships onto their Mission 2 Discs, which are also then resolved in Sailing order.
This process continues for the Mission 3 and Mission 4 Discs.
At each Destination only 2 successful attacks are allowed. If any attacks can't be done the player takes back the Disc, then the "next to arrive" ship from among any extra ships waiting at that Destination will get a chance to attack on its turn. Similarly, at the Trade Ports if a player can't trade he takes his Mission Disc back.
If successful, an attacking player receives the VP listed on the target and he turns his Disc face- down. Once there are 2 face-down Discs no further attacks may occur. The bonus for the first player to successfully attack a Destination is the accompanying Gold, Silver or Jewel, which is taken and put into that player's Treasure Chest.
To successfully attack a Destination the player must give up a number of Crew (grey cubes) and/or Guns (black cubes) equal to the number of Troops and/or Guns that defend that Destination.
A player may choose to not take an action with a particular Mission Disc (he may not be able to attack successfully or he may choose to wait for a better target later) and the Disc is returned to his supply.
Attacking Towns
Next to each Town there is an icon showing 1 Troop. To attack a Town the player must spend 1 Crew (grey cube) to neutralize this Troop. Having spent 1 Crew the player then moves his Score Marker the number of VP as indicated on that Town.
Then he places one of his Player Cubes on the Town icon of the Types of Conquests Chart, to indicate he has successfully attacked at least 1 Town.
The first player to successfully attack each Town gets the advantage of claiming the Silver or Gold on it.
Attacking Forts
Next to each Fort are its troop and gun defenses. The first player to attack a Fort turns over the defending Troop Counter and adds the number printed beneath it. This total is how many Crew (grey cubes) must be spent. As well the player must spend Guns (black cubes) equal to the number of gun icons there.
Having done this, the player then moves his Score Marker the number of VP as indicated on that Fort. Then he places one of his Player Cubes on the Fort icon of the Types of Conquests Chart, to indicate he has successfully attacked at least 1 Fort.
Players who have a Pinnace may ignore the guns when attacking any Forts on this voyage. The first player to successfully attack each Fort gets the advantage of claiming the Silver or Gold on it.
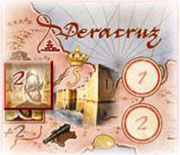
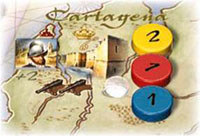
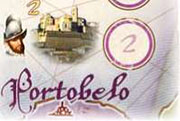
Example 9: To attack Veracruz in this case requires 4 grey cubes and 1 black cube. This scores 5VP for up to 2 players who attack here, but the first attacker will get the Gold.
If attacking with a Pinnace the guns are ignored and only 4 grey cubes would be needed to successfully attack Veracruz.
Attacking Galleons
Each Spanish Galleon has a number of guns on it, to which must be added the number of guns indicated on the Spanish Frigate Counter placed next to that Galleon. The first player to attack this Galleon turns over the defending Frigate Counter.
To attack a Galleon, the player must spend this number of Guns (black cubes). Having done this the player then moves his Score Marker the number of VP as indicated on that Galleon. Then he places one of his Player Cubes on the Galleon icon of the Types of Conquests Chart, to indicate he has successfully attacked at least 1 Galleon.
The first player to successfully attack each Galleon gets the advantage of claiming the Jewel on it.
Example 10: To attack this Galleon, requires 4 black cubes. This scores 8 VP for up to 2 players who attack it, but the first attacker will get the accompanying Jewel.
Trading
Each Trade Port has Commodities that can be traded. The first player to trade there chooses which Commodity he wants and subsequent players choose from what remains. Players return one Trade Goods (purple cube) to the Plymouth Harbor Chart and take the Commodity and place it on the corresponding icon on their Ship Log.
Multiples of each type may be accumulated. The number of circles at a Trade Port indicates the number of trades that may occur there on that voyage, but only 1 trade is allowed per player per voyage at each Port.
F. Returning To Plymouth
After any one of a player's Missions is completed he may announce that he is returning to Plymouth and he moves his Ship to the first empty dock in the Homebound Harbor. He takes back any unused Mission Discs still on the board, e.g., a player returning to England after his 3rd Mission, then takes back his 4th Mission Disc since it will not be used.
A player must do this after his 4th Mission.
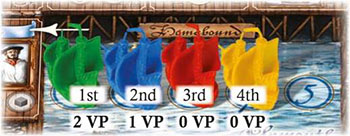
Players returning to Plymouth early (before they have used their 4th Disc) receive a "hero's bonus": The first player back gets 2 VP and the second player gets 1VP, so long as they successfully attacked at least 1 Town, Fort or Galleon on their voyage.
Example 12: Using the positions from Example 8 - Green decides to go home after attacking Puerto Cabello (Mission 3). Blue goes home after his 3rd Mission. Red and Yellow each do their 4th Mission and return home in that order - Red was going before Yellow in the sailing order. Green gets 2 VP and Blue gets 1 VP.
G. Scoring The Voyage
After all players have returned to Plymouth, each player checks the Types of Conquests Chart to score his voyage. Players' Cubes have been placed on the Town, Fort and Galleon icons if the player successfully attacked any of these on his voyage.
One type attacked gives 1 VP, two types gives 4 VP and if all three types were attacked the player earns 10 VP. These are scored on the score track.
The holder of the Admiral gets 1 VP for each unclaimed Gold and the holder of the Governor gets 1 VP for each unclaimed Silver.
H. Reset The Board
At the completion of voyage 1 and 2 the board is reset in preparation for the next voyage.
Commodities are the only items retained by players.
The following items are returned to the Plymouth Harbor Chart:
All barrels, grey, black and purple cubes.
The Spanish Frigate and Troop Counters.
The Governor, Admiral, Pinnace and Informer Counters.
Any unclaimed Gold, Silver and Jewels.
Players take back their Player Discs from the Locations, their Mission Discs from the Destinations and the Outbound Harbor and their cubes from the Navigation Markers.
The cubes on the Different Conquests Chart are reset.
The players' ships in the Homebound Docks are all reduced to Frigates again, then reset in the following order, for the start of the next voyage: The player in last place on the Score Track goes in the first Dock, 2nd last goes in the 2nd Dock, 3rd last goes in the 3rd Dock etc. In case of a tie, the tied players remain in the same relative order as for the last voyage.
The Location Tiles are shuffled and laid out random- ly over the first 16 Locations on Plymouth Street.
Shuffle the 3 Galleon Counters and place 1 face-up, on each of the 3 galleon icons on the board.
Replenish the Treasures, so that each Town, Fort and Galleon has its displayed Gold, Silver or Jewel.
Replenish the Commodities, so that each Trade Port has 1 of each of its displayed Commodities.
The Voyage Marker is moved to the next voyage number.
Voyages 2 And.3
Voyages 2 and 3 are conducted in the same manner except that the starting order is determined by the order of ships in the Homebound Docks after the board is reset following the previous voyage.
The board is not reset after the 3rd voyage, because the order of the ships in the Homebound Docks is used as the tie- breaker at the end of the game.
Also the order of the 16 Locations is different for voy- ages 2 and 3 because the Location Tiles were shuffled and placed over the top of the first 16 Locations printed on the board.
End of the Game
After the third voyage has finished, players then score:
1. Commodities
Using the Commodities Chart, players score VP for sets of Commodities they have collected.
- Each set of 4 different Commodities scores 26 VP
- Each set of any 3 scores 16 VP
- Each set of any 2 scores 8 VP
- Single Commodities score 2 VP
2. Treasure Chest
Each player removes the Treasures from his Treasure Chest and scores them as VP on the Score Track.
Silver = 3 VP, Gold = 4 VP, Jewels = 5 VP.
The winner is the player with the largest VP total. Ties are broken by the order of the ships in the Homebound Dock at the end of voyage 3.
Continue Reading


