
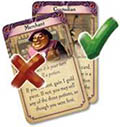
Two to four players take the role of alchemists competing to discover the secrets of their mystical art. Points can be earned in various ways, but most points are earned by publishing theories - correct theories. Therein lies the problem.
Players gain knowledge by mixing ingredients and testing the results using a card-scanning app on a tablet or smartphone. They deduce how to make potions that they can sell to adventurers.
Gold pieces can be spent on magical artifacts, which are very powerful but also very expensive.
Players' reputations go up and down as their theories are published or disproven. At the end of the game, reputation is converted to points. Points are also scored for artifacts and grants. The player with the most points wins.
Components

- double-sided game board
- theory board
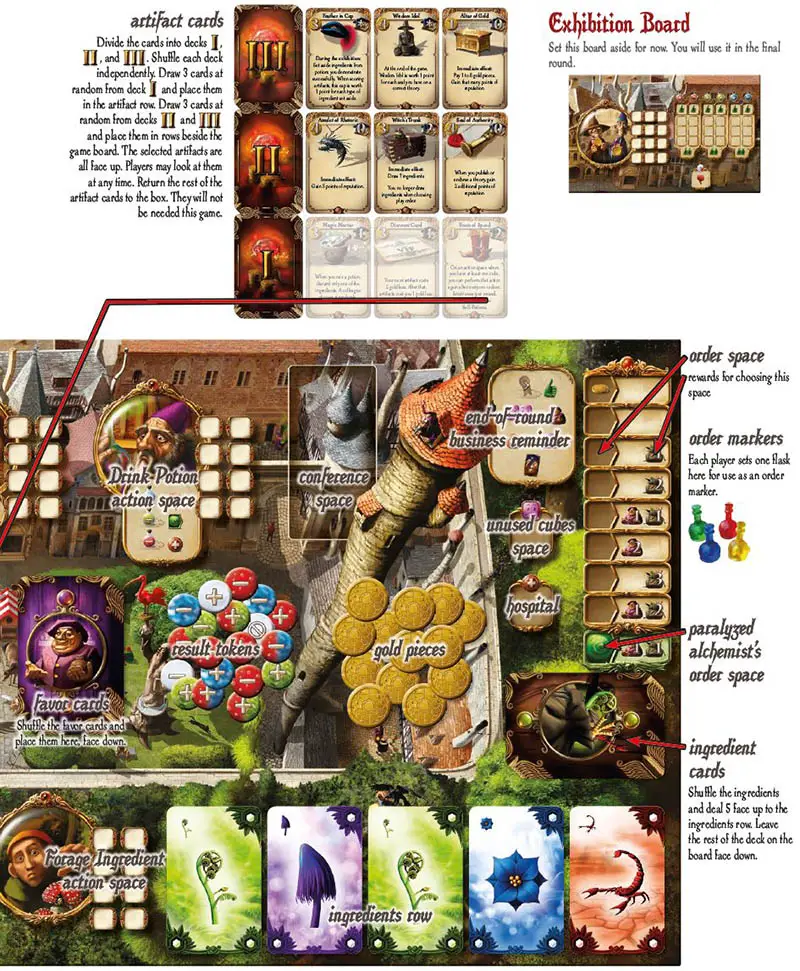
- exhibition board
- 4 laboratory screens
- 4 results triangles
- 4 player boards
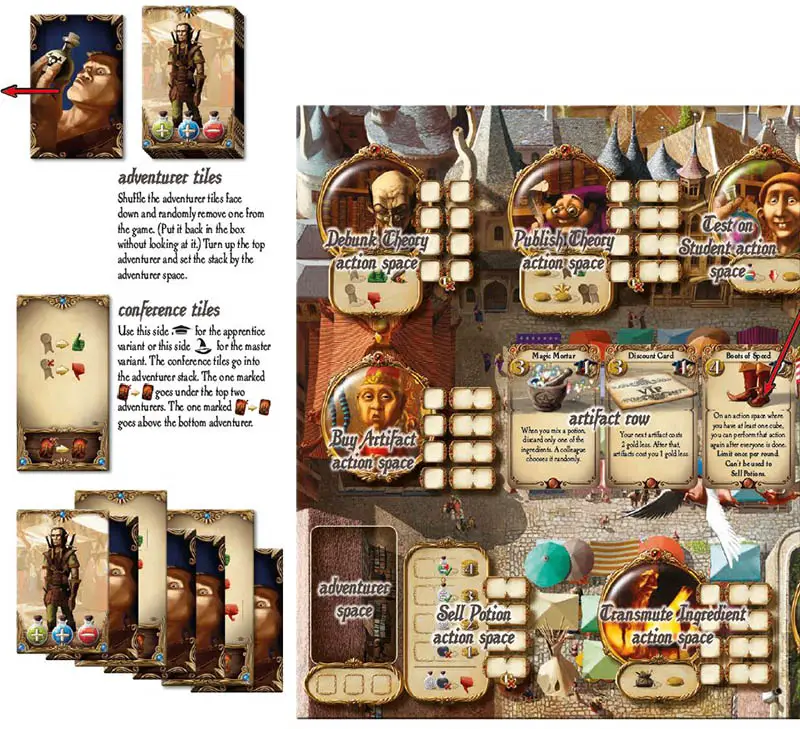
- 6 adventurer tiles
- 2 conference tiles
- 5 grant tiles
- 8 alchemical tokens
- 104 result tokens
- 36 gold piece tokens
- 44 seal of approval tokens (set of 11 in each color)
- 6 conflict tokens
- starting player token
- 8 ingredient tiles
- gamemaster board
- 40 ingredient cards
- 22 favor cards
- 18 artifact cards
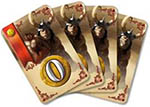
- 16 bid cards
- 8 plastic beaker figures (2 in each color)
- 24 plastic cubes (6 in each color)
- pad of deduction grids
- containers for tokens
- rulebook
Game Elements
Click here to read the basic Principles of Alchemy.
Setup
Ah, but the craft of alchemy is about more than mixing potions. Alchemists seek knowledge, of course, but what they truly value is prestige. Making your mark on the world will not be easy.
You need to publish before your colleagues do, expose the flaws in their theories, and get the powerful artifacts before they are all sold out. You see, you are not the only alchemist in town.
Master or Apprentice
You can play Alchemists either as masters or apprentices. For your first game, we recommend you play the apprentice variant. A few of the rules are simpler, and the academic conferences are more forgiving. Even so, it offers the full range of possibilities.
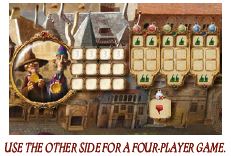
Two, Three, or Four Players
This side of the board is for a four-player game. The setup for two or three players is the same, except you use the other side of the board.
Player's Laboratory
Public Section
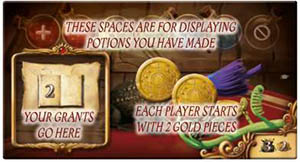
The types of potions you have already made, your grants, your artifacts, your number of gold pieces, and the number and types of cards in your hand are always public knowledge.
Playerboard
Action Cubes
The number of action cubes depends on the number of players.
- two players: 6 cubes.
- three players: 5 cubes.
- four players: 4 cubes.
Leave extra cubes in the box.
In all cases, you use only 3 action cubes in the first round. Put your remaining cube or cubes on the adventurer stack. This reminds you to take the full complement at the end of the first round.
Private Section
The types of ingredients and favor cards in your hand, the types of seals you play, the ingredients in your experiments, and your deductions from results are always kept secret from the other players. This information can be hidden behind your laboratory screen.
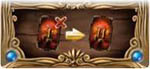
Bid Cards
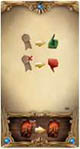
Favor Cards
Each player draws 2 favor cards, chooses one to keep and one to discard.
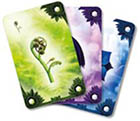
Ingredient Cards
Apprentice Variant: Each player draws 3 ingredients from the top of the deck.
Master Variant: Each player draws 2 ingredients from the top of the deck.
Seals

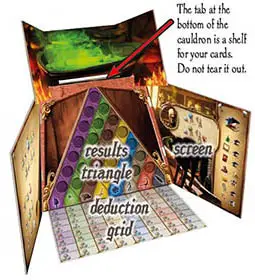
Laboratory Cauldron
The cauldron can also go on the left or right side. It can even stand alone.
Theory Board

Initializing The Card Reader
At the start of the game, launch the app, select the master or apprentice variant, and tap the  button. The app will randomly assign each ingredient a different alchemical. (So if you were hoping to gain an advantage by remembering the answers from the previous game, you are out of luck).
Each randomization has a four-letter code. Write this down. If you need to complete the game on a different device (for example, if your first card reader runs out of power), just tap  and type the code into the new device. It will use the same randomization as the first device. This system also enables you to play with two or more card readers if you wish.
The Round
The game is played in six rounds. At the beginning of each round, players choose their play order. Then players declare all their actions for the round. During the round, actions are evaluated in order, clockwise around the board.
Choosing Play Order
You start your day with a leisurely walk through the forest, looking for interesting things to grind up in your laboratory. Or perhaps you spend some time doing favors for people around town ... in exchange for favors later, of course.
Beginning with the player with the starting player marker and proceeding clockwise around the table, each player chooses an order give you more a disadvantage when resolving actions.
When it is your turn to choose, place your order marker on one of the unoccupied order spaces and draw the indicated cards.
Two players cannot choose the same space, and no one can choose the green space at the very bottom. That's a special space for alchemists who drank a  potion on the previous round. In a 2-player game, you cannot choose the space labeled
Drawing Ingredients

Draw the indicated number of ingredients from the top of the deck. Do not take any of the faceup cards. Those are available only from the Forage Ingredient action space.
Drawing Favor Cards

These represent favors that the townsfolk owe you. Draw the indicated number of favor cards from the top of the deck.
If either deck runs out of cards, shuffle its discard pile to make a new deck.
Favor Cards
Favor cards give you a single-use advantage during some part of the round. They will tell you when they can be used. Some favor cards say "play immediately". These must be played as soon as you draw them. After you play a favor card, it goes to the discard pile.
Getting Nothing

Sometimes (usually when conference deadlines are approaching) you need to get things done quickly. In that case, forget ingredients, forget favors. You just eat a quick breakfast and run off to get your work done.
If you choose this space, you draw no cards, but at least you will get to go first ... or maybe second.
Paying Gold

Sometimes you don't even have time to make breakfast. Instead, you buy fresh rolls from the baker and eat them on your way through town. To choose this space, you must pay 1 gold piece. If you don't have the gold, you can't choose this space.
On this space you draw no cards, but you are guaranteed to go first. Yes, sometimes it is that important.
Play Order
For the rest of the round, play order will be determined by the order of the markers on the order spaces. The starting player marker will have no further effect this round. At the end of the round, it will be passed to the left and the next round will have a different starting player.
Declaring Actions
Once all players have chosen an order space (and drawn their cards), it is time to declare actions. The player lowest on the order spaces must declare his or her actions first, followed by the next lowest player, and so on. Players who chose the higher spaces (with fewer cards) will have the advantage of seeing what other players are doing before they declare their own actions. When it is your turn to declare actions, you declare all your actions at once.
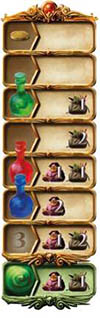
Place your action cubes on the actions you want to take this round. Different spaces have different requirements as illustrated below.

Each player has their own row, corresponding to their position on the order spaces. If you are lowest on the order spaces, you declare actions first and place your cubes in the bottom row at each action space. The next player places cubes in the row just above the bottom row, and so on. The player highest on the order spaces will go last and place cubes in the highest row. In a 2-player game, the rows marked or are not used.
Example: In the illustration on the left side of this page, Blue is lowest. He must declare actions first. Red goes next. Note that in the illustration at the bottom of this page, Red's cubes are always in the middle row. Green is highest. She declares actions once she knows everything that Blue and Red plan to do. Her cubes go in the first row.
First Round Exceptions
In the first round, you are allowed only 3 action cubes. In later rounds, you may use your full set of cubes. (The number of cubes depends on the number of players).

The three actions marked with this symbol are not available in the first round.
Resolving Action Spaces
Each action space is resolved in order, clockwise around the board, as shown.

On each action space, players take their actions in order, beginning with the player on the highest occupied row. When you take your action, remove your cube. (Or remove both cubes if the action requires 2 cubes). Once everyone on the action space has taken their first action, players with two actions may take their second, in the same order.
Declining Your Action
When it is your turn to perform an action, you may change your mind and decline your action instead. Pick up your cube (or cubes) and put it on the unused cubes space . At the end of the round, every pair of unused cubes will allow you to draw 1 favor card.
Actions Available in First and Second Round
Read here all detailed information about the actions available in the first round.
Read here all detailed information about the actions available in the second round.
End of the Round
A box next to the order spaces reminds you of the things that happen at the end of the round. Resolve them in the order shown.
Top Alchemist Award

The player with the most seals on the theory board gains 1 point of reputation. If no theories have been published, no one gets this award. If players are tied, all tied players gain 1 point.
It doesn't matter whether the seals are original publications or endorsements. And of course it doesn't matter whether they are starred or unstarred because that information is secret. But if you are playing the master variant, don't count seals on theories with conflict tokens.
Unused Cubes

The round doesn't always go as planned and sometimes you have to decline actions and move cubes to the unused cubes space. For each pair of cubes you have here at the end of the round, draw 1 favor card. (An unpaired cube doesn't get you anything).
Take back your unused cubes. You should have the full set now ... unless a Drink Potion action put you in the hospital.
Hospital

Once the unused cubes space is empty, move any cubes from the hospital to the unused cubes space. They will count as unused cubes at the end of the next round.
New Adventurer

Remove the old adventurer tile if it's still hanging around. Put the next one on the adventurer space. If this reveals a conference, it will occur at the end of the next round. Set the conference tile on the conference space, after the Drink Potion action space. Conference or no, turn the top adventurer tile face up. You will always know which adventurer is coming to town one round ahead.
Conference
The alchemy conference is always well attended. Alchemists come from far and wide to exchange knowledge with their peers. Well, actually it's just a big brag fest, but the sandwiches are nice.
If you set up the adventurer stack correctly, there will be conferences at the end of rounds 3 and 5. (If you didn't set it up correctly, fix it now). The conference takes place after resolution of the Drink Potion action space and before the top alchemist award and other end-of-round business.
Those who have the required number of publications and endorsements gain 1 point of reputation. Those who do not will lose reputation points as indicated by the conference tile, depending on the number of seals they have on the theory board. As with the top alchemist award, count all seals (except for those on theories with conflict tokens).
No one enjoys the embarrassment of arriving at the conference with nothing to brag about. There's always a rush at the publisher's office when conference papers are due.
New Artifact Cards
The end of the conference also marks the arrival of new artifacts. Remove any artifacts still remaining on the board and deal out the three new artifacts - level after the first conference or level after the second.
Then it's time to move on to the top alchemist award and the other end-of-round business.
Setup For Next Round
If any ingredient cards are left in the ingredients row, remove them. Deal 5 new ingredients to the row. If the deck runs out (during setup or at any other time) shuffle the discard pile to make a new deck.
Move all the order markers off the order spaces. (Except for any that were put on the paralysis space this round).
The starting player marker should be passed one place to the left. (If it is passed to a player whose order marker is stuck on the paralysis space).
Now you are ready for another round of discovery, glory, and mocking the fool who published that ridiculous theory about scorpions.
The Final Round
The game lasts six rounds. At the beginning of the final round, the final adventurer will be placed next to the Sell Potions action space. (There are 6 adventurers, you randomly chose 1 to return to the box, and there was no adventurer in the first round).
Exhibition
Mostly, alchemists try to impress each other, but once in a while it can be satisfying to demonstrate our skills to the masses.
When setting up for the final round, place the exhibition board over the Test on Student and Drink Potion action spaces. They will be replaced by the Exhibit Potion action space. Select  on the card reader.
Exhibit Potion actions are declared with your other actions. You are limited to the number shown (3 in a four-player game or 4 in a two- or three-player game).
This is the final action space to be resolved, after Publish Theory. Each cube is worth 1 action.
When it is your turn to exhibit a potion, remove your cube from the action space and place it on one of the six potions depicted on the exhibition board. This is the potion you are promising to exhibit. (You can't choose a potion you have already successfully exhibited. The neutral potion is not depicted because no one is impressed by toad soup).
Prepare two ingredients in your laboratory as you do for experiments, tap  on the card reader, and scan the ingredients. Discard the ingredients afterwards, as usual.
If you do not get the result you claimed, move your cube to the space. You lose 1 point of reputation.
If you are the first player to successfully exhibit that potion, you gain 1 point of reputation. Put your cube on the space.
If you successfully exhibit that potion but you are not first, your cube goes on one of the other spaces below. You get no points for mixing that potion, but you can still try to mix its opposite. Read on.
If you successfully exhibit 2 different signs of the same color during the exhibition, then you have demonstrated mastery of that color. Score 2 points of reputation. (More than one player can score this bonus).
You do not have to play here in the final round. Note, however, that ingredients in your hand are worth nothing during final scoring, so this is your last chance to make use of them.
Once all the actions are resolved, score the top alchemist prize and draw favor cards for pairs of unused cubes, as usual. Then it is time for final scoring.
Final Scoring
Reputation Points And Victory Points
Reputation points are gained and lost during the game. Certain artifacts give you reputation bonuses, and your zone of the scoring track can affect how much reputation you lose.
Victory points are scored at the end of the game. Reputation bonuses and penalties do not apply to them. Most victory points are positive, although you can lose points when the true identities of the ingredients are revealed.
At the end of the game, score victory points as follows:

All reputation points become victory points. So if you ended the game with 16 points of reputation, you begin final scoring with 16 victory points.
Next, score the victory points for your artifacts.

Special cases: If a player has the Magic Mirror, that player should count up points for the Magic Mirror first, before other artifacts and grants.
If a player has the Wisdom Idol, it is not scored until after the Big Revelation.

Next, score the victory points for your grants.

If you have any favor cards left in your hand, exchange each favor card for 2 gold pieces.

Now score one-third of a victory point for each gold piece. Or, to put it another way, buy 1 victory point for every 3 gold pieces, and keep any leftover gold pieces as a tiebreaker.
The Big Revelation
And now comes the moment of truth. Place the card reader where everyone can see it and tap  .
.
Do you really want to show the answers? Yes, of course you do! This is your moment of glory!
The card reader will tell you which alchemical was associated with each ingredient. Go through the theories one-by-one. On each theory, reveal all the seals.

If the theory is correct, each player scores the following points for a correct seal:
- Gold-starred seal: 5 points.
- Silver-starred seal: 3 points.
- Unstarred seal: no points.

If the theory is incorrect, players lose points, as follows:
- Starred seal: -4 points.
- Unstarred seal, not properly hedged: -4 points.
- Unstarred seal, properly hedged: no points.
How do you tell if the unstarred seal is "properly" hedged? Look at the aspects of the incorrect theory. If only one aspect is incorrect, then seals hedged against that color are properly hedged and seals hedged against a different color are not properly hedged. If more than one aspect is incorrect, then none of the seals can be properly hedged.
Note that players are losing victory points, not reputation points. They don't suffer a loss of 2 extra reputation for being in the blue zone. The red, green, and blue zones of the scoring track have no meaning during final scoring.
Conflict tokens do not matter at this point of the game. The seals score positive or negative points regardless of conflict tokens. (If you are playing the apprentice variant, you aren't using conflict tokens, anyway).
End of the Game
The winner of the game is the player with the most victory points. Break ties using leftover gold pieces, as explained earlier. If players are still tied, they remain tied. Well done!
Continue Reading

